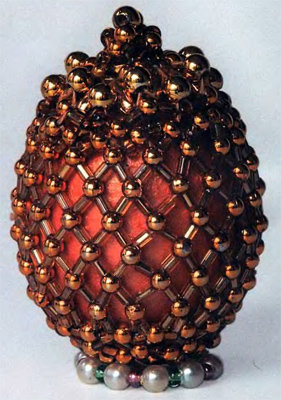
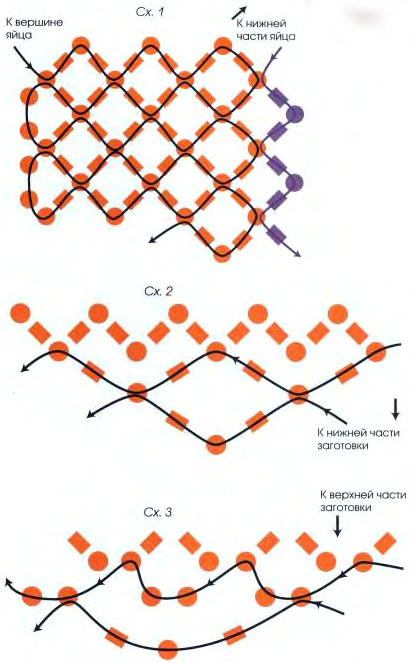
To weave an egg from the beads, start with the manufacture of the belt according to the diagram 1 (the author of the work E. Vilchevskaya). Please note that the grid cell facing the top of the billet — trimmed. It consists of 8 beads, and 7, and the bending and as a key woven beads, but in any case not cutting! Otherwise, cutting will cut the thread. When you are ready to mesh-based, connect it and put the workpiece. It must be worn very tightly and snugly to the egg. The next phase of work, which will get the egg from the beads - entanglement of the lower hemisphere of the workpiece. Bring the needle from any "edges" of the mesh. If you allow the bending proplatit one row, as shown in a different color in figure 1. As the restriction of the workpiece, you can change the rhythm (CX 2). Then you can go to set the beads without cutting and even if you want to use the beads to match the beads. The bottom closes smoothly and beautifully. The first time you will be surprised as all get well. The upper hemisphere of the egg braid is a little more difficult as the workpiece is sharply narrowed. But we've thought of (think of a truncated cell on the grid?). Figure 3 shows an example of podpletennaya elite. To spice up a plain egg, woven without ornamentation, can be arbitrarily embroider the top of his head beads of the same color (can be slightly bigger than basic). The result is a beautiful egg from the beads.


")