


")
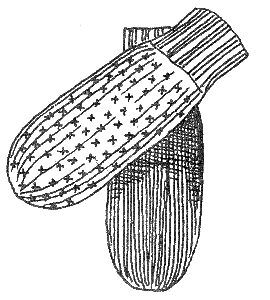
Figure 164.
Mittens on two needles, knit in the following way: from the finished cuff promazyvayut top and bottom. Then sew them and iron. To make the seam less visible, the top half, make 1 cm wider than the bottom.
Before you begin, remove the measurements in figure 165.
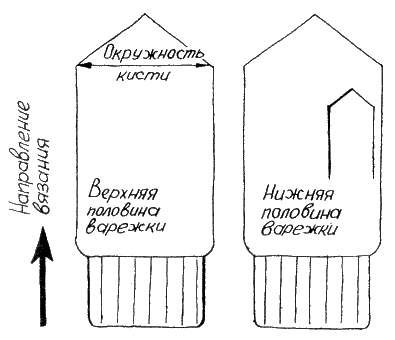
Figure 165. Removing the measurements
Circumference (measure the widest part of the bones).
Brush length (from wrist to end of middle finger).
Brush length from wrist to end of finger.
Brush length from the wrist to the base of the thumb.
Length of the thumb from the base to the middle of the nail.
Circumference of the wrist. For calculating a pattern product measurements circumference of the hand and wrist divided by two (based on two patterns).
The lower part (palm), and cuff from any type of mittens are knitted in the same way.
Knit cuff (for any type of mittens).
Calculating the number of stitches for the cuff (wrist circumference), we collect them and knit her gum or facial loops with the "cloves" (see lesson 5). The height is arbitrary.
Povezav the cuff, turn on the brush knitting mittens. The first half of the loops 4 loops to use in knitting the top, and the rest take the safety pin (after promazyvanija top remove the hinge pins and are finished the lower part).
The lower part (palm) gloves.
The remaining loop after proveski the upper part of the cuff are finished 6 cm up socks and knitting. After this, proceed to the execution of the thumb. Provyazat 3 loops, remove from the spokes and put the next 10 stitches on a safety pin (figure 166). Is taken 10 making loops on the needle 10 loops (see lesson 3, "Adding loops").
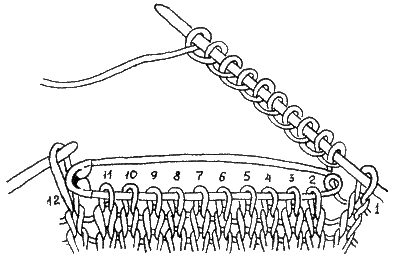
Figure 166. Education hole for the thumb
Continue to work stocking knitting to the end of the little finger. Then begin the descent of the loops exactly the same as in the upper part of the mitten.
Binding of a finger.
Remove the 10 loops with a safety pin on the needle and knit the height of the finger to the middle of the nail and begin the descent on both sides on the front side; when the needle will have 2 loops, interrupts the thread and tighten the loop. The second side of the finger picking up knit air loop and adding 2 loops on the edges of the mating finger (loop 1, 12 figure 166). The 12 loops are finished until the middle of the nail of the thumb and discharged. Then sew the two halves of the finger on the reverse side. The remaining ends of the filaments are fastened on the wrong side over the edge of the loops.
The upper part of the mittens (back of the hand) can be linked in two ways:
using the pattern or colored stripes;
a relief pattern.
The upper part of the mittens with designs or colored stripes.
The width of the brush mittens needs to be more palm. So add 1-2 loops on the edges of the product and the knit fabric prior to the subtraction loops. To decorate the canvas, you can color patterns or ornamental belts. Then at the beginning and end down to 2 loops (2 loops along the front) in the front ranks. When the spokes there are 2 loops, interrupts the thread, extend through these loops and tighten.
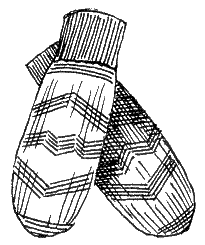
Figure 167. The upper part of the mittens with ornament
The upper part of the mittens with a relief pattern (figure 168).
On the middle line of the upper part of the mittens are finished with 3 loops along the front. In the same row at the edges of knitting add with nakido or taking promazyvanija loops between the loops of the restoring of the initial number of loops.
Purl rows knit without changes, taking in each average, the average loop nepovezane. When he reached the end of the little finger down on one loop at the beginning and the end of the row until the spoke will not stay 1 loop. After that, interrupts the thread and tighten.
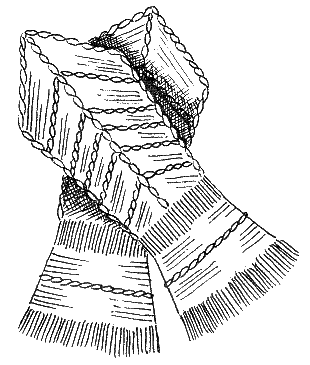
Figure 168. The upper part of the mitten with a relief pattern
2. USEFUL TIPS
One who knows how to crochet, you can make half of the product columns without nakida on the front side of the mittens.
Implementation fringe is shown and described in the next lesson