Whatever thing you may knit, first vivaselecta control sample. It is knit from yarn that is designed for the model. It helps to make sure suitability intended pattern for existing threads. If the sample was successful, it is possible to proceed to the calculation of loops for the product. On the drawn pattern can be accurately calculate the number of loops that need to gain on the spoke to get started. This dial on the spokes 20-25 loops and knitting of the selected pattern 4-5 cm and Then iron knitted sample from the inside using a wet cloth and applied to the pattern, count the number of times the selected sample will fit along its width.
You can define the number of loops in another way. For this selected sample are slightly stretched (if it is not ironed) and measure its width. Dividing the number of loops in the resulting number will determine the density of mating (the number of loops in 1 cm).
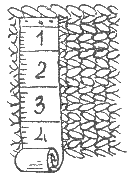
Figure 144. Determining the number of loops
For example, if you scored for a sample of 30 loops and it turned out width of 12 cm, the density of binding in this case is equal to: 30/12=2.5 loops in 1 cm.
Knowing that the density of the binding we defined, we need to determine the number of stitches for the width of the knitted product. To do this, the width of the product (say, product width 10 cm) multiplied by 2.5 loops: 2,5x10⁻²⁵ loops.
2. KNITTING FROM TWO BALLS
For more exact symmetry and increase the speed promazyvanii parts (left - right sleeve, etc.) used knitting from two balls. The spokes are recruited from the first ball of the calculated number of loops. Sliding the dialed loop, we repeat the same set from the second ball and are finished loops 2 sets of 2 balls.
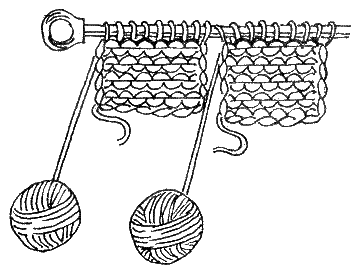
Figure 145. Knitting from 2 balls
3. VYVAZHIVANIE SHOES
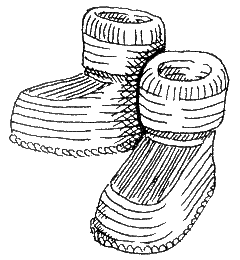
Figure 146. Shoes
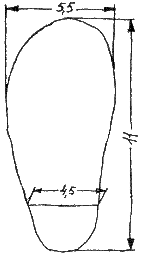
Figure 147. Drawing insoles
Shoes for children from 1 to 1,5 years knitting needles No. 2 of thick wool.
Recruited 56 plus 2 edge loops and knit 4 cm "rope" (see lesson 2). Next, divide all the loops into 3 parts: - 23 hinges for the side parts (side panels) and 10 loops for the Central part of the Shoe (instep). 23 are finished the front of the loop. The next 9 stitches (instep) - knit "band 2x2", and the 33rd and 34th loops are finished along front hinge. 22 the remaining loops on the needle leave nepovezane.
Turn work inside out and knit only medium 9 loops. The following 2 loops are finished inside-out, leaving the other side 22 of the loop also does not knit. From this point knit face and the other side only 9 loops (ascent) "band 2x2", and the last loop from the Central part (10 loop) and the first sidewalls are finished together. To obtain smooth edges 2 extreme loops formed from the descent, turning the work, remove not promazyvaya. This descent of the loops continue until the, while the sidewalls remain at 13 loops. The number of loops in the Central part of the rise will remain the same (10 loops). When the needle will remain 36 loops, knit "rope" 5 cm without any changes. Then promazyvayut 6 rows "elastic 1x1" and finish the Shoe 6-8 rows of "rope".
In order to link sole, on the spoke gaining 10 loops and knit "rope".
Slipper sew. In the finished Shoe it is recommended to put an insole made of cardboard. To knit the sole of the Shoe can sew leather or cloth Foundation.
As a decoration for shoes made of twisted cord and pompom. For the manufacture of cord you will need thread 3 times longer than the future of the cord. Thread need to fold in half and twist both ends in opposite direction (figure 148), or to fix one end and tighten the other to one side, pulling the thread. When the thread is rolled up, fold both ends together and the cord twist spontaneously. Spread his hands and fixed with 2 sides.
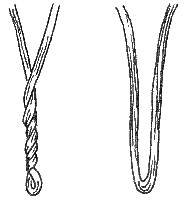
Figure 148. The twist of the strands in the cord
For the manufacture of POM-POM cut out of cardboard 2 identical circle (figure 149) with the holes in the middle.
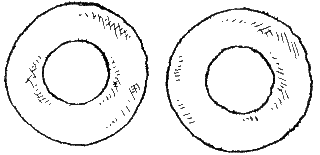
Figure 149. Making circles
Apply one to the other. Sewing needle evenly wrapped around the circle until then, until the hole is filled with tight turns (figure 150).
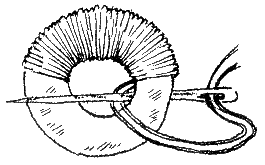
Figure 150. Wrapping the mug threads
Thread carefully cut around the outer edge of the circle (figure 151). Between the circles of cardboard are missing a thread or string tightly and tie a small knot, passing into the hole in the cardboard and thread (figure 152). Scissors carefully cut circles from the edge and shoot them. The resulting POM-POM shake, and tie the thread knot cord and POM-POM (figure 153).
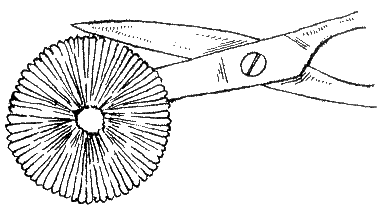
Figure 151.
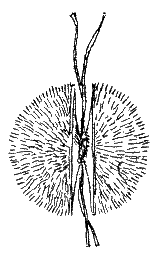
Figure 152.
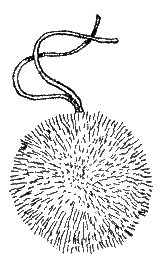
Figure 153.
4. USEFUL TIPS
When knitting the instep of the shoes should carefully calculate the loop and colored thread to make a label for the beginning and end of the climb to determine the transition to the knitting "braids" in the middle of the product.
The sole of the Shoe, you can tie a hook and make a compacted region at the front side.


