- Method of knitting Raglan herringbone
- Method of knitting a Raglan - the wiring of the 4 loops
- Decorative decrease for repanich bevels
- Raglan with garter loops knit
- Crochet sleeveless a-line Raglan
- Knitting the front of the shelf with sleeves "Raglan"
The back of any style knit pattern (here we consider a method of knitting from the bottom up). Linking the gum, go to the main pattern. Dawasa product to openings produced by the decrease at its bottom edge. To produce the decrease, it is necessary to calculate the number of loops. From point D1 drop the perpendicular and at the intersection with TH set point H2. The resulting triangle H1-H2-G use for the calculation. Measure the line segment G-H2 and the cut OF. The results of the measurements add up and subtract the sum of the size of a piece of GF. Then according to the obtained result count number of loops. We got the hinges necessary for the subtraction on line reglan.
Consider the above calculation on the model 30 size: cut ГН2=5 cm; PF=2 cm; GF=17 cm
ГН2 + OF = 5 cm + 2 cm = 7 cm;
GF - (ГН2 + PF) = 17 cm - 7 cm = 10 cm.
Translate the resulting centimeters in loop (1 cm = 3 loops): 10 cm x 3 p. = 30 loops.
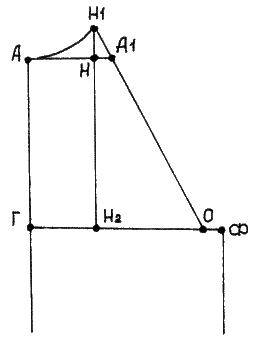 Figure 432. Drawing back Raglan
Count the number of rows: НН2 x 4 rows = 16 cm x 4 rows = 64 rows.
Calculate the frequency of bavleny: 64 series : 30 loops = 2
In this case, in each 2-m row do the decrease, the first decrease to make in the 5th row. Making the calculation, start knitting on the example of the 30-th size. Dovlatov the product to a point f, close the 4 loop "pigtail". Viveza 1st row, turn the product inside out and close the 4 loops of the "braid" of purl loops. Provyazat 4 row 5 row, make 1 decrease. 1st row- provyazat 3 front 3 front are finished first, 2nd and 3rd along the front of the front wall, then without removing them from the needles, the 1st loop front back and continue the row to the last 7 loops the left side, counting the edging. Next knit. First, the 3rd front loop over the front wall, then the 1st and 2nd along the front of the front wall. Next 3 are finished and the front edge. Thus, we have lowered the 2 loops on the Raglan. Remove continue to sprout. Do the calculation in the above diagram and knit the neckline. This method of knitting the line of the Raglan is the easiest. There are several ways of knitting the Raglan lines.
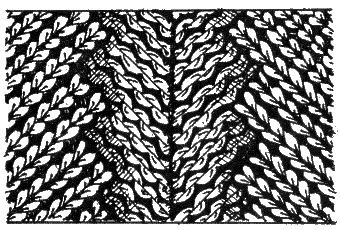 Figure 433. Raglan herringbone
Method of knitting Raglan herringbone
The line of the Raglan can be knit and purl loops in the form of steps. To do this, diminish the loop at the bottom of the armhole from point f to point On and knit:
- 1st row-in the beginning and at the end of 5 including inside-out edge;
- 2, 3, 4, 6, 7-th series - like look loop;
- 5th row- first 3 together. including edging, purl 3, purl together the last 3;
- 9th row- repeat pattern from 5th row.
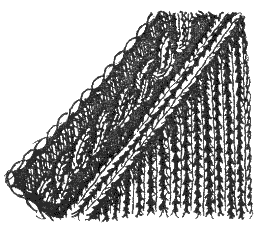 Figure 434. The wiring of the 4 loops
- 1, 3, 7-th rows in front of the row 2 purl, 4 facial, 1 wrong, 1 front, 2 together parecida. Next knit pattern product. When the needle will be 11 loops, including the edge, knit 2 together for the upper wall, 1 facial, 1 purl, 4 front and 2 reverse;
- 2nd and all even rows - drawing like look loop;
- 5th row- make cover harness: 2 purl, 2 loops (1st and 2nd) remove the pin (the pin on the front side of the work), are finished 3rd and 4th, then remove from pins 1 and 2 and 2 alternately are finished the first loop shot facial, 1 purl, 1 front, 2 along the way parecida. Continue the row until the spoke will remain 11 loops, including the edge, 2 together for the upper wall, 1 facial, 1 purl, the wiring of the 4 hinges (pin on the wrong side), purl 2;
- 9th row-repeat pattern from 5th row.
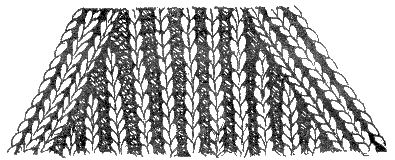 Figure 435. Decorative decrease for repanich bevels
Raglan with garter loops knit
With the right edge in each 2-m row of the first 4 loops and knit 5 purl loop. The 6th and 7th loop together knit into the purl. For the second bevel 7-th and 6-th loop from the left side to purl together, purl, 5th loop - back, the other 4 loops facial. In the back ranks of all the loops purl.
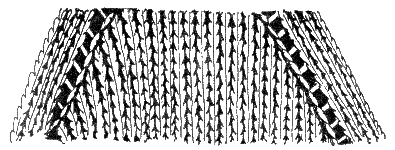 Figure 436. Raglan with garter loops knit
Crochet sleeveless a-line Raglan
In the same way as the knitting set-in sleeves to the top of the crown. The calculation of the line of the Raglan similar to the calculation of the Raglan of the back;
Knitting the front of the shelves with Raglan sleeve
In the same way as front detail with sewn in sleeve. If you have the clasp, then knit it together with shelf. Knitting a-line Raglan similarly, binding of the Raglan of the back (description see above). Knitting sprout is the pattern.
Knit Raglan top with needles (knitting Raglan from neck to edge)
- The advantages of knitting top-down Raglan
- Disadvantages of knitting Raglan from top down
- Knitting Raglan from top down
- Double face loop along the line of the Raglan
- Harnesses on the edges of the lines Raglan
- The wiring on the line of the Raglan
- Wide relief prosa
- Prosa "tree"
- the absence of seams;
- fairly easy change the length of your products (this is particularly valuable in baby clothes when the baby is growing rapidly);
- less ends of the yarns when knitting.
- difficulties binding (in many loops);
- limited choice of models;
- limited choice of pattern.
Starting from a set of loops. The number of loops equal to the volume of neck plus 1-2 cm for the zipper (if it exists). If your model has a stand-up collar, it fit in one piece with Raglan, and the other types of collar are knitted separately and sewn. If the collar is in the product is missing then the work begin to trim about 2cm of the front loops (the width of the border is independent of the size).
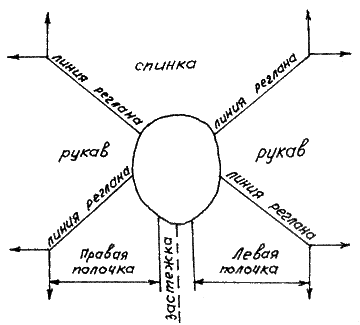 Figure 437. The scheme of the Raglan top down
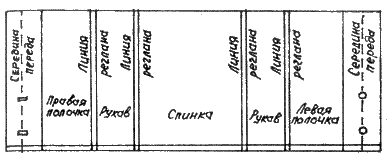 Figure 438. The distribution of loops in a Raglan from the top down
Loop back don't divide; in front (if without zipper) do not divide; loop 3 part divided by 2 (two sleeves). If the front of products with a clasp, you gain an additional loop for knitting front straps with magnetic closure.
Consider the calculation loops televising Raglan 34 size (girth of the neck line 30 cm).
1 cm knit 3 stitches. The designated number of loops for a set: 30 cm x 3 loops = 90 loops.
Plus 10 loops on the strap clasp: 90 loops 10 loops = 100 loops.
From the resulting numbers, we subtract 4 loop Raglan (if the line of the Raglan equals the 1st loop). The remaining loops are distributed into parts, loop parts, divided by the number of items: 100 loops to 4 loops = 96 loops; loops 96 : 3 pieces = 32 loops (in each part).
- back - 32 loop;
- on sleeve: 32 hinges : 2 pieces (two sleeves) = 16 loops (on each sleeve)
- before have 32 loops. But when knitting shortened rows in the back and 2 sleeves should be recalculated and each sleeve subtract 4 loops and add to the shelves of the front.
- back - 32 loop;
- on one sleeve - 12 loops;
- on a shelf is 20 loops.
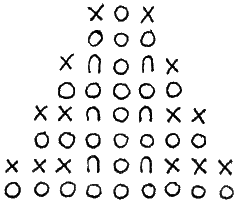 Figure 439. A diagram of the line of the Raglan with front loop
ATTENTION! Such additions do in every front row of each line Raglan (in each front row is added for 8 loops). Due to this, shelves, back, sleeves gradually expanded to the armhole.
2nd row purl - knit to the center of the 2nd the left sleeve. Turn work and knit to the center of the 2nd sleeve. Again turn the work.
3rd row front - when he reached the center of the left sleeve are finished 3-5 loops and turn the work. Every time you turn catch 3-5 loops towards the shelf.
So knit until closure (if not to the center front of the shelf). Promazyvaya basic pattern until the end of the lines of the Raglan, do not forget to add a loop. The line of the Raglan can be issued any decor.
Double face loop along the line of the Raglan Line Raglan fit two front loops. The edges of each front row doing nakida and they are finished on the reverse side reverse open loops. On the front side of the resulting openwork holes.
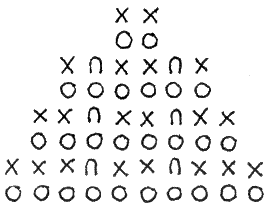 Figure 440. Double face loop along the line of the Raglan
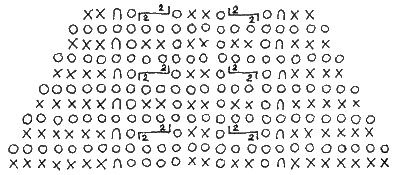 Figure 441. Harnesses on the edges of the lines Raglan
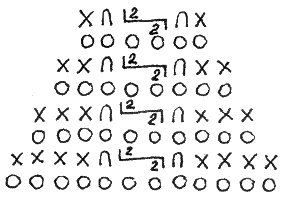 Figure 442. The wiring on the line of the Raglan
- 1st row- 10 front (main leaf), 1 loop add (figure 444), 3 purl, 2 top 1, 1 top 2, 3 purl, 1 added, 10 front;
- 2nd and all even rows - drawing like look loop;
- 3rd row: 11 facial, 1 add, 2 purl, 1 added, 11 facial;
- 5th row- 12 front, 1 add, 1 purl, 2-I'm on top of the 1st, 4 front, 1 top 2, 1 purl, 1 added, 12 front;
- 7th row pattern repeat from the 1st row (continue to add before and after the line of the Raglan of the 1st additional loop).
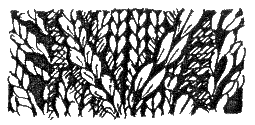 Figure 443. Wide relief prosa
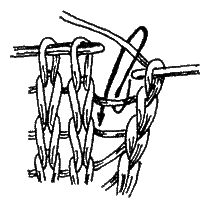 Figure 444. Pulling the loop from the gap between the loops
- Preparatory row - purl 5, 2 front, purl 7, 2 front, purl 5;
- 1st row- 5 front, 1 add, 2 purl, 1 yo, 2 together parecida, 3 facial, 2 together for the front wall, 1 yo, purl 2, 1 loop to add 5 facial;
- 2nd and all even rows - drawing like look loop;
- 3rd row- 6 front, 1 add, 2 purl, 1 front, 1 yo, 2 together parecida, 1 facial, 2 together for the front wall, 1 yo, 1 facial, 2 purl, 1 added, 6 front;
- 5th row- 12 front, 1 add, 2 purl, 2 front, 1 yo, 2 together parecida, 1 yo, 2 facial, 2 purl, 1 added, 7 front;
- 7th row pattern repeat from the 1st row.
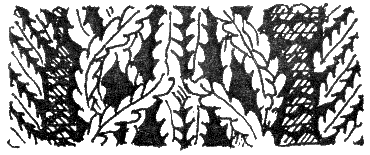 Figure 445. Prosa "tree"
When dowiazanie on circular needles the loops of the sleeves to remove the thread. Finished front and back, remove the hinge sleeves on the needle and knit with the decrease in the above calculation.
For this calculation, the Raglan can be knit not only jackets and dresses with long clasp, but with a short strap (figure 446).
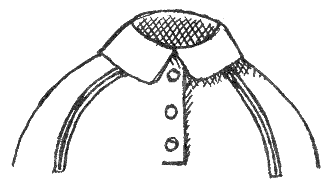 Figure 446. Collar with short placket
Useful tips In the male things, the clasp is done from left to right. Knitting Raglan from top down to produce circular knitting needles.


