


")
1. THE TECHNIQUE OF STITCH-IRON ROCOCO
This technique of embroidery was used even by our ancestors. From other styles, it is distinguished by the diversity and quirkiness of completed patterns. In this technique, elements of the patterns are swirls and rings.
We will consider three versions of this seam:
"Daisy."
"The knot".
"Rosette".
1. Applying the seam, get the flower "Daisy" (figure 529). The size of the petal of this flower should not exceed the triple thickness of thread. Each petal of the flower - single stitch seam.
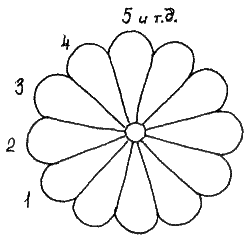
Figure 529.
Fasten the thread in the center of the flower with the knot. The seam runs from the center to the end of the petal (figure 530).
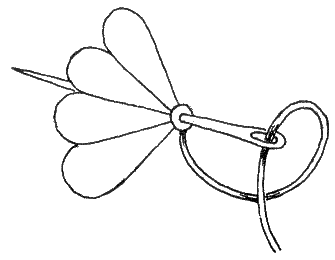
Figure 530.
Performing a suture, threading the needle from the center to the edge of a petal, the needle is not pulled and wound on the end of a string (about 10-15 turns) (figure 531).
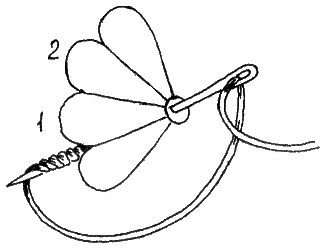
Figure 531.
The number of turns on the needle must equal the length of the petal. Holding a finger on these coils, gently push the entire needle and followed the whole thread through these coils. The coils will be on a string worn as a necklace. Turn the end of the thread from the formed to the center of the flower columns, pull and fasten in the center. So being processed each petal in a circle. The last stitch in the center of the last petal dockable.
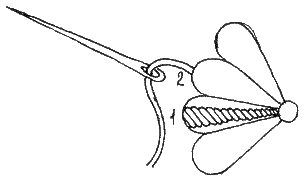
Figure 532.
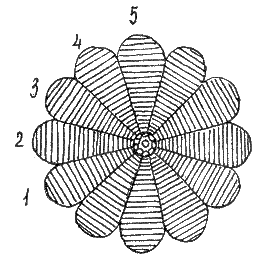
Figure 533.
2. The center of the flower stamens issued, executed seam "lace" (performed "lace" like a stitch "Daisy", he only has 3-4 round and ends at its beginning).
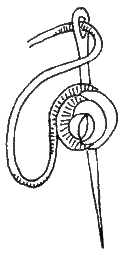
Figure 534.
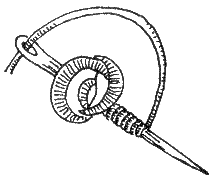
Figure 535.
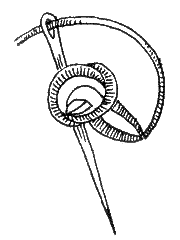
Figure 536.
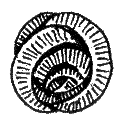
Figure 537.
3. Stitch "rose" is different from the stitch "Daisy" just the fact that its petals are not scattered in different directions, and are rolled in the Bud. The flower "rose" as the flower "Daisy" in the center issued a "knot".
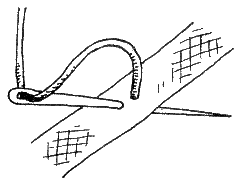
Figure 538.
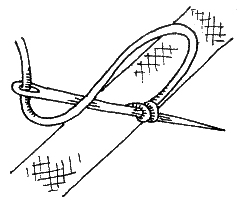
Figure 539.
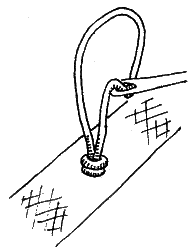
Figure 540.
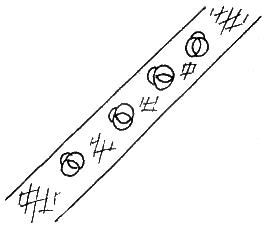
Figure 541.
2. "CHAIN STITCH" SEAM
Chain stitch (or stitch a "chain") has a chain, each link of which comes from one another. Used for decoration embroidered children's clothing. Progress from right to left. Stitching, remove the needle podernuta thread at a distance of 1/3, see after Pulling a needle and thread, pulled it forward and clamped taut with the thumb of the left hand. Then inject a needle in the place where they took it out, and hold the tip a further 1/3 cm forward on podernuta thread and print it out. Without removing the needle from the fabric, making the tip of the needle thread and hold it with your thumb so that it formed a semicircle. After that, we derive a needle and thread from the web. The noose pulled around arm's length of thread and get the first stitch of the seam. Then repeat stitches in pattern pattern.
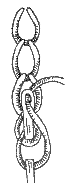
Figure 542. Chain stitch
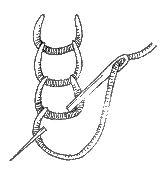
Figure 543. Double chain stitch
3. SEAM "LOOP"
Used to wrap. applications. The seam runs left to right. Facial and purl stitches are perpendicular to the edge of the product. Starting from the bottom left corner. From the inside of puncture needle cloth on the front side. All subsequent stitches are sewn on the front side on the reverse. After the first puncture the filament is directed down, holding it with the thumb of the left hand. Puncture do with the front side on the wrong side and guided the tip of the needle in a loop. The needle pulls through the loop and pull the thread down on yourself. After finishing the seam, the last noose.
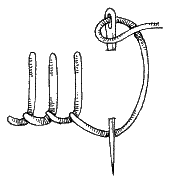
Figure 544.
4. SEWN STITCHES
Runs a thick thread. The finished stitch is fixed at the center. Further, continuing stitches, ensure that they lay close to each other.
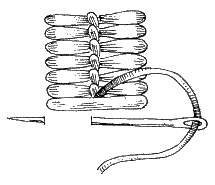
Figure 545.
5. USEFUL TIPS
The seams in this tutorial, you can fine-knitting crochet fabric crochet.