1. VERTICAL POCKETS
Vymazyvaja common thread. Promazyvaya pocket at the same time with loops straps, reach the place he starts, and divide the work into 2 parts. One part of the subject, and the other knit.
Making some loops for planetski (loop strap can be issued a "pigtail" or any finishing pattern). Reaching the top of the strap, close it "pigtail". The rest of the shelves are not yet knit. Next, go to the part where will be placed the burlap pocket.
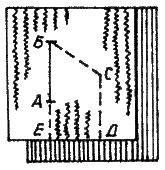
Figure 475. Markup Welt pockets
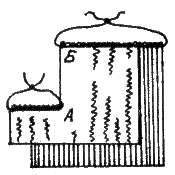
Figure 476. Promazyvanie Welt pockets
Making air loops and knit them at the same time with a shelf of socks knitting. Making loops in the quantity necessary for the formation of the pouch, which will put that together for the 2nd part of the pocket. Having finished this part of the pocket shelf up to the height of the associated first part of the closed loop of the pocket in one go "pigtail". All the loops of fabric collected on one needle and continue to knit the shelf to the end. Sacks filed a second slit pocket.
2. POCKET "CLUTCH" LAPEL
Pocket "clutch" is a type of vertical Welt pockets. His knitting starts from any distance from the elastic on the canvas of the product. It is used primarily for children's clothing.
The product is divided into 3 parts and fit of the 3 skeins to the required height. Further, all 3 parts promazyvaetsya, along with a tangle. Dovlatov the shelf, go to work on the burlap.
Burlap to fit inside. We collect the required number of loops with the middle part of the product.
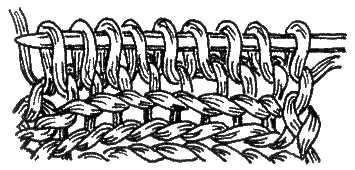
Figure 477. A set of loops
Typing air loops are finished burlap height equal to the height of the pocket. After the burlap, the edges of anchoring "rope" and stitch.
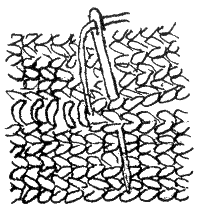
Figure 478. Sewing burlap
Extreme loops at the front side, prepare lapel. The lapel may be rectangular and rounded.
Rectangular lapel vivaselecta set of loops along the edge of the pocket flat canvas.
Rounded lapel vivaselecta set of loops on the edge. At the same time knit the two loops together at the top and bottom along the edge of the lapel after edging. These two loops are finished in front and purl rows 4-6 times (the number of promazyvanija depends on the steepness of curvature).
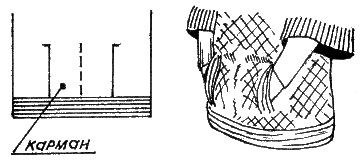
Figure 479. Pocket "clutch" lapel
Lapel you can issue the "rope" or rubber band. The end flap is attached to the product.
3. PATCH POCKET
A patch pocket is not only practical value but also a decorative element of the model. The pocket can be knit braid pattern, etc. To stiffen the top of the pocket, make rubber or any other tight binding.
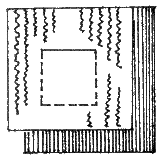
Figure 480. Marking SMD pocket
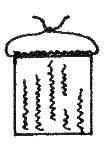
Figure 481. Knitted pocket
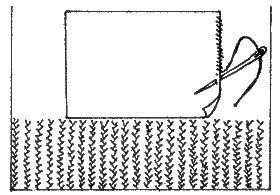
Figure 482. Sewing pocket
Associating a rectangle of desired size from any suitable viscous, sew it to the product.
4. POCKET "KANGAROO"
Vivaselecta separate rectangle and is sewn to the product like patch pocket. To pocket is not saggy, it is sewn in the center.
Pocket finishing draw yarn or pattern.
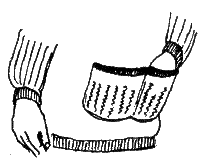
Figure 483. The pocket on the product
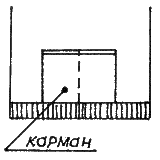
Figure 484. Drawing pocket "kangaroo"
5. POCKETS HORIZONTAL
Before you make a pocket, you need to knit burlap. Burlap knit hosiery knitting. The last row of the burlap off the string. Shelves knit the pattern. The starting line the pockets of 10-12 cm from the waist line. Slit pockets - 10-12 cm Height of the pocket depends on the model. Pocket width is 2 cm smaller than the burlap.
Dawasa to cut lines pockets, loops, remove the pin and reserve on the front side. Pending on the thread loop of burlap spread to left needle and vivasyan together with shelf.
The first of the burlap and the last loop of knitting together the front shelves. And so do on the wrong side of other side of pocket (that we put a shelf and burlap).
After the shelf, remove the hinge pins on the left needle and are finished edging of the pocket. Edging can be issued colored ornament or pattern knitting.
Edging is attached to the shelf, a hidden seam. The same suture is attached burlap to the shelf.
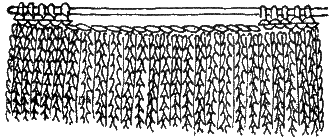
Figure 485. The front side of the pocket
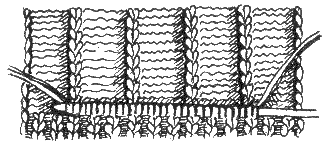
Figure 486. A set of loops on the burlap
6. SLANT POCKET
Manufacturer of pocket like the implementation of vertical Welt pockets.
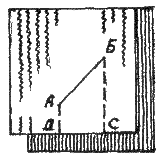
Figure 487. The layout of the pocket
Begin knitting with the layout of the pocket on the product. Next, knit the shelf to the point A. Divide the shelf into 2 parts: 1st is located on the side; 2nd side. Loop lateral part of take a pin or thread and knit. After a point And start the decrease to obtain the slope (on the right shelf - on the face, on the left - on the wrong side). The decrease to make two loops together on the line AB.
Dawasa to point B, end purl next. Then loop remove the pin or thread (figure 488).
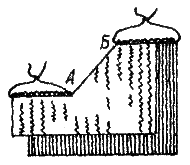
Figure 488. Slant pocket
Take a new ball and by tilting himself on the associated part, are entering a new loop of "braids" plates, on the line of SD. Next, knit a rectangle of burlap pocket (hosiery knitting) to point A. the Work of finishing the front rows. Loop lateral part perenimaet with a pin onto the left needle and knit the row until the end of the main pattern. Turning the work inside out, knitting main viscous to the line AB, the rest of the loop - back or the front.
In all other rows the same binding, but with an offset of 1-St loop to the right (the triangle ABE belongs to the burlap pocket and knitted hosiery knitting).
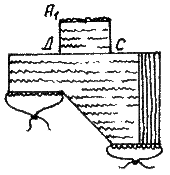
Figure 489. Knitting burlap
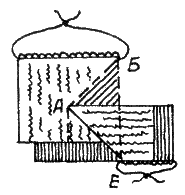
Figure 490. Bevel burlap
Dawasa side to point B, finishing up the front near the open loop part of the shelves from the side perenimaet with a pin onto the left needle and knit up a shelf piece. When shelf ready, typed on the line cut hanging loops from the edge and knit finishing strap width 2 cm of Its lateral edges attached a hidden seam and thread (matching colour). Sew the burlap of the 1st pocket and move on to the second.
7. USEFUL TIPS
Making a product with Welt pockets, pockets for symmetry knit from 2 balls.
If you got carried away and forgot to make a horizontal slit Welt pockets, the error can be corrected without spreading the product. The proposed shelf on the cutting line of the pocket. In the middle of the line one loop cut and Raspletin range from the middle to the left and right pockets. The resulting hole exposed loops. Next, make a pocket in the way described in the lesson.
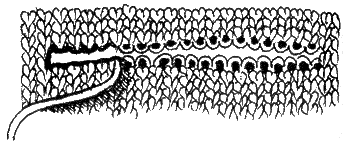
Figure 491. Blooming loops under pocket


