For the sample recruited 25 turns (or more) and knit:
1st row-knit all the loops of the front binding;
2nd row- the pattern repeats from the 1st series. The same pattern can be obtained if in each row, only knit purl loops.
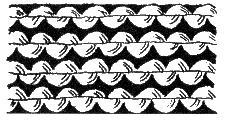
Figure 35. Garter knit
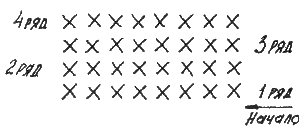
Figure 36. Scheme garter knit
2. HOSIERY KNIT
For the sample recruited 25 turns (or more) and knit:
1st row-knit all the loops of the front binding;
2nd row- all loops knit purl viscous;
3rd row: pattern is repeated from the first row.
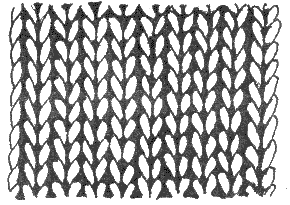
Figure 37. Hosiery knit

Figure 38. Scheme of hosiery knit
3. GUM 1x1
Used when knitting sleeves, socks, mittens, hats, scarves and sweaters.
For the sample recruited 32 loop (or any other even number) and knit:
1-St row - 1 front loop, purl 1, etc. until the end of the series.
2nd row- 1 loop facial, 1 purl, etc. until the end of the series.
3rd row: pattern is repeated from the first row.
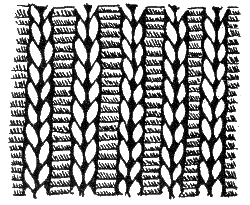
Figure 39. Gum 1x1

Figure 40. Scheme gum 1x1
4. ELASTIC 2x2
Used when knitting sleeves, socks, mittens, and rubber bands of any jerseys.
For sample, dial 24 loops (or any other number that is a multiple of 4, plus 2 edge) and knit:
1st row- 2 facial loops, purl 2, etc. until the end of the series.
2nd row- 2 facial loops, purl 2, etc. until the end of the series.
3rd row: pattern is repeated from the first row.
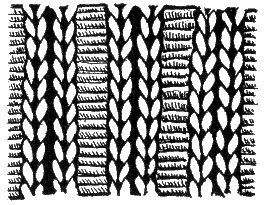
Figure 41. Elastic 2x2

Figure 42. Scheme gum 2x2
5. BINDING SHOWN BELOW
Binding double-sided. Used for knitting scarves, hats and mittens. 1, 5 and 9th rows of the pattern promazyvayut the front loop over the front wall.
For the sample recruited 34 loop (or any other number that is divisible by 8, plus 2 edge) and knit:
1st row - 4 facial loops, purl 4 etc. until the end of the series.
2nd row - 4 facial loops, purl 4 etc. until the end of the series.
3rd row- as 1st row;
4th row- as 2nd row;
5th row - 4 purl, 4 front loop etc. until the end of the series.
6th row - 4 purl, 4 front loop etc. until the end of the series.
7th row- as 5th row;
8th row- as 6th row;
9th row- the pattern repeats from the first row.
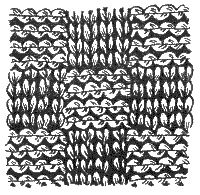
Figure 43. Binding shown below
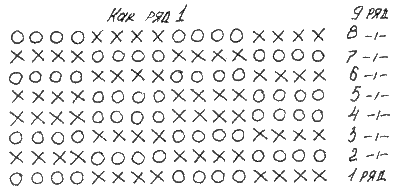
Figure 44. The mating scheme is shown below
6. BINDING "thread waste" 1x1
Binding double-sided. Used for knitting scarves, hats, mittens and socks.
For the sample recruited 32 loop (or any other multiple of 2, plus 2 edge) and knit:
1-St row - 1 front loop, purl 1, etc. until the end of the series.
2nd row-purl 1 loop, 1 front, etc. until the end of the series.
3rd row-purl 1 loop, 1 front, etc. until the end of the series.
4th row- 1 front loop, purl 1, etc. until the end of the series.
5th row- the pattern repeats from the first row.
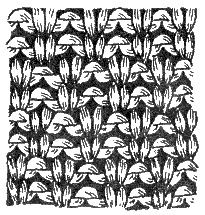
Figure 45. Binding "thread waste" 1x1
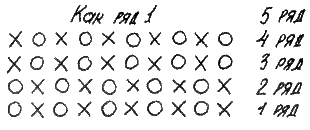
Figure 46. Schema binding "thread waste" 1x1
7. BINDING "thread waste" 2x2
Binding double-sided.
For sample, dial 26 loops (or any other number that is a multiple of 4, plus 2 edge) and knit:
1-St row - 1 front loop, purl 2, etc. until the end of the series.
2nd row-purl 2 loops, 2 front, etc. until the end of the series.
3rd row-purl 2 loops, 2 front, etc. until the end of the series.
4th row- 2 facial loops, purl 2, etc. until the end of the series.
5th row- the pattern repeats from the first row.
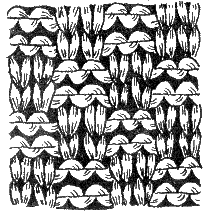
Figure 47. Binding "thread waste" 2x2
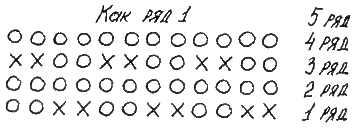
Figure 48. Schema binding "thread waste" 2x2
8. THE FASTENING OF LOOPS
Securing loops used in the end of work. There are two ways of fastening of loops.
The first option (figure 49)
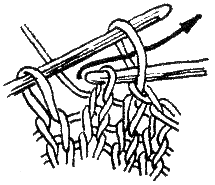
Figure 49. The fastening of loops
Are finished two loops together, i.e. the edge and following it. The right needle, grab the two loops together at the front wall and pulling the loop. As a result of two loops get one. This. remove loop from right needle back to left and tie the two loops one. And so are finished before the end of the series. When the needle will remain one loop, the thread breaks. Leave 5-6 cm of yarn which is introduced into the loop and tighten.
The second option.
Remove the first loop, the second knit or purl face, depending on the site. On the right-hand spoke of the resulting two loops. Left needle introduced into the removed loop, gently pulling her up and drags her through the knit in the loop. Then knit the 3rd loop in figure 49, and smuggles her into the loop on the right needle.
So knit to end of row. When there will be one loop, the thread cut and loop pull.
9. USEFUL TIPS
Before knitting the pattern, you must ensure the correctness of the set number of loops, otherwise intended binding may not be possible.
Odd-numbered rows are always executed on the front side and even numbers on the reverse.
The height of the edge loops should match two knit rows.
Finding error in the previous row (the front loop instead of the reverse), incorrectly connected a loop to dissolve. This thread is correct in pattern and knit the working yarn.


