


")
Since time immemorial, garments are decorated with embroidery. Decorate handkerchiefs, collars, yoke, hems of shirts, blouses, dresses, pants, belts, skirts. Embroidery can be done in bright contrasting colors or tone products. The choice of thread depends on the fabric from which the sewn product. For blouses and dresses of thin materials typically use silk thread or embroidery floss. For the embroidery of clothing made of thick cotton and wool fabrics it is possible to apply floss a few additions or woolen yarn.
You'll need
Ready white blouse of a thin fabric (muslin, Voile, silk) with English collar or collar type Apache; thread floss in 1, 2 addition in white; embroidery needle; diagram of the pattern in full size; embroidery; tracing cloth; awl; colored chalk or a pencil.
Progress
The scheme of the pattern in full size transfer on a tracing-paper and the contour of the motive awl make holes. Attach the tracing paper with the pattern on the collar blouse and swipe all the lines colored chalk or pencil so that it traces imprinted in the holes. Remove the tracing paper and slide the fabric in the Hoop.
The motive is embroidered by gladium roller seam "goat", "forward needle", stalk, knots.
Seam "forward needle", select all the contours of the motif of thread to 1 addition.
First and foremost, follow the flowers. Petals embroider stitch thread in 2 additions. Every stitch, start in the middle of the flower. All stitches are put very close to each other. In the middle of each flower embroider 3 bundle. Attach yarn on the wrong side. Print it on the front side and make a few turns of the working thread around the needle, holding them horizontally over the fabric. Gently slide the knots to the tissue, and a thread pull on the wrong side, tightening the knots.
There are several types of surface. One of them is the oblique surface. The stitches lay at an angle to the warp and weft. It is used mostly in floral patterns.
The leaves complete the seam "goat". Pull the needle on the front side and make a diagonal stitch to the right and down at the same time bringing the needle there on the left side. Put the 2nd diagonal stitch on top of the 1 St to the right in the form of a cross. Thread needle and pull on the left side, in the same way, complete the rest of the stitches. Then highlight the contours of the leaves, seam "back needle". On the front side stitches run in the opposite direction, sticking the needle exactly at the point of the previous stitch. On the reverse side stitches pointing forward. They should be 2 times longer than on the front side.
The strands run stalked seam. Pull the needle with the working thread on the front side, and pull the stitch diagonally. Bring the needle with the working thread on the front side in the middle of the 1st stitch. The rest of the stitches lay the same way.
Iron the finished embroidery from the wrong side through a damp cloth (Fig. 77).
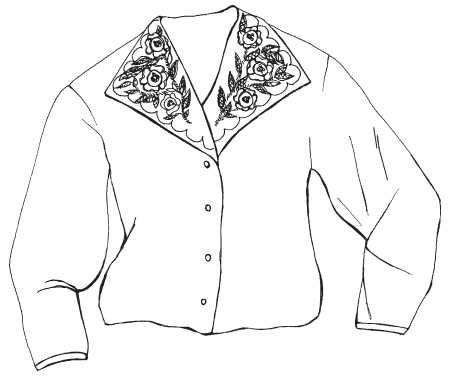
Figure 77. Blouse, embroidered in the corners of the collar