


")
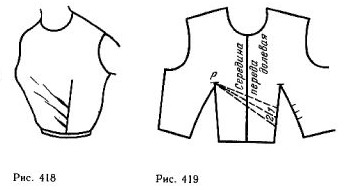
From point P draw three lines that represent the draped folds. The strips between the lines indicate the numbers 1 and 2.
Cut the pattern along the lines of Darts and on the strips 1 and 2 (figure 420). Close the left tuck and slide details. The upper fold line of the tuck will be the deepest.
Put nadziejko in the middle of the front on the waist line, to align it with the same nadrezkoj on the skirt. Since the model is asymmetric, specify the front side patterns (tissue).
Details a draped, it is recommended to do with lining to prevent them from stretching (if the bodice is quite tight at the waist, the lining is optional).
Lining (preferably made of thin silk) should be cut to the basic mold. It should be located from one side seam to the other, and not from the folds. At the top it should be on the neckline and shoulder seams.
Zautyuzhte and sew Darts in the bodice. Put de tal bodice to the lining, adjusting the notch, shoulder, side and other cut, and staple two layers of fabric short basting stitches, performing them with silk thread in the color of the fabric at a distance of 0.2-0.3 cm from the slices.
Leave loose draped detail part, which is freely during the fitting of the bodice to the skirt.
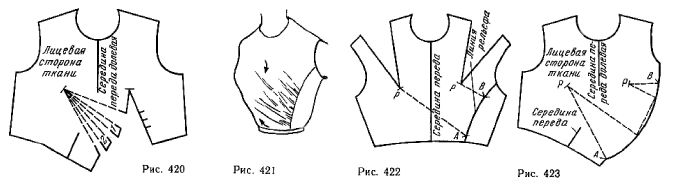
The draped bodice instead of two Darts (figure 421). Draw a line of elevation on distance from the point P (the middle of the chest is equal to 7-8 cm) and determine the width of the drapery (figure 422, the notch A and b).
If the distance separating the relief from tuck, is quite significant, it is better not to foresee the placement of the folds of the drapery, as in the previous example. Do it in the fitting.
Cut the pattern along the lines of relief and spend the dashed lines from the points P to nadechka A and b, as shown in figure 423. Cut the pattern along those lines and close the top tuck.
For slice of relief lay in the equity tape to protect it from stretching. Adjust the slicer and fasten it on the second part of the front at points A and B. Keen cut, making pre-drape.
Focus-draped pleats Refine the fitting.
The elegance of the bodice depends on the method of distribution of folds (stretched or softer) and out of their depth. Sometimes it is better to do Assembly, or very little creases. It all depends on the material and shape.
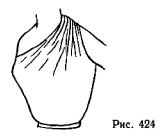
Bodice with antique drapery. This drape to perform in the surrounding bodice, rising very high at hand (figure 424).
Below the bodice is well sit on a figure without forming extra folds from the waist to the chest, the tuck of the waist line of the basic patterns should have a corresponding amount of solution. If you doubt its accuracy, don't cut out the bodice front to the first fitting, and replace it with the bodice lining, cut to the basic mold. Check the bodice to prepare a final pattern.
Starting from the armhole, draw a line to the line of the shoulder cut is the direction of the drapery (see long dashes in figure 425). Then draw a line translation of the Darts (see short lines), as shown in figure 425. Cut them the pattern and close the Darts. Reproduce the drawing on another sheet of paper. Guide the smooth line of the shoulder cut (figure 426).

With a piece of cloth Refine on the figure the direction of draping and its width (for the proposed model the desired width of 40-50 cm for draped stretch 6-8 cm).
A draped finish to the shoulder seam, where it is held by straps running from the back and cut along with the front. If the drape needs to continue on the back (it surrounds the neck or fastened rather low on the back), it is enough to continue the line as shown in figure 426.
The direction of the grain lines coincides with the line of mid front, transferred to the mold. Draping is bad for equity and well — in the oblique direction yarns.
For more thick drapery cut pattern on the arrows, as shown in figure 426. Spread the strips 1, 2, 3 and 4 at the desired distance.
Bodice with asymmetrical draping (figure 427). Prepare a mold of the front of the bodice entirely. Close the Darts, place it on the figure and draw a line of translated darted to the left. Place the template on the table (figure 428).
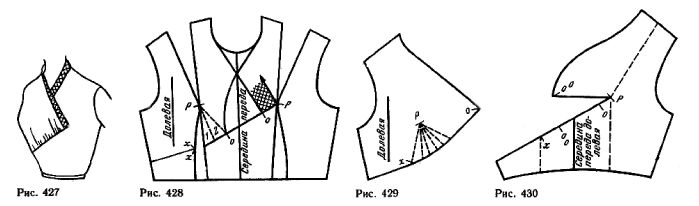
Mark the width of the strip of the collar on the line transfer Darts from point R (right nadechka about). Starting on the notch, draw the right line of the neck, guiding her mouth to the base.
Since the strips of the collar intersect symmetrically on the line of mid front, draw the left side of the neckline, straight to the middle of the front and curved downward (the notch).
Mark touches the line of translation of the Darts on the right side and number the strips (1 and 2). On the right side of the bodice, specify the direction of grain lines parallel to the middle of the front.
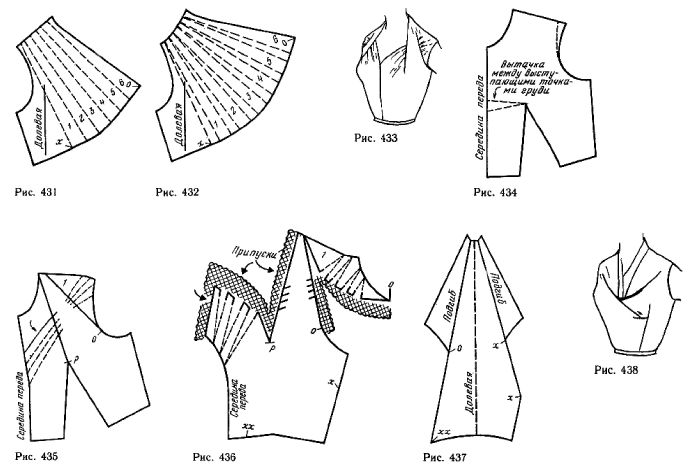
Put separately right and left side of the bodice. Closing the top of the tuck, you will receive part of the patterns shown in figure 429 and 430.
On the patterns right side of the bodice (see figure 429) divide into equal strips the entire surface, collected into assemblies, and number them (figure 431). Cut the pattern into strips and spread them on the size of the extension. Draw a line between nasecki x and o (Fig 432).
The bodice is draped free (figure 433). Random call free, loose draping.
As illustrated in figure 433 bodice with a deep neckline for a more snug fit you need to make a tuck between the most protruding points of the chest (for example — a solution of Darts equal to 2 cm, figure 434). Translate this tuck in the tuck of the waist line (figure 435).
The seam through the middle of the front in this model is justified by the presence of pleats. The same model is possible to implement and with no seam in the middle, positioning the drape on the fold of the fabric, but in this case, the neckline should almost reach the level of tuck between the points PP.
Extend the line of the shoulder cut by 3-4 cm, slightly bent it around the arm openings. On the finished auxiliary pattern, draw model lines: the line of soft folds, forming a neckline, and a line that runs from the armhole (nadechka o) to the line of the shoulder cut at a distance of 3-4 cm from the first line.
From these lines diverge up and down the little folds that create the impression of integrity of the entire part. Edge neckline replaces the top fold.
Put the four lines in the notch, cut pattern on them, cut and close the tuck of the waist line (figure 436). Move item 1 from model lines 2 cm at the level of the first fold (greater expansion will violate the visual integrity of form). Lay on parts 1 small folds, like a continuation of the main folds of the bodice.
When cutting out the patterns, leave it a wide margin, as the halter formed model lines and freely superimposed on the folds of the draperies, it would be better to emphasize those creases.
With the same purpose, short / need to do on the lining. The drawing will continue down the model line straps until they intersect with the lines of the bodice (figure 437, the notch x, and XX). Draw the outlines of patterns, make allowances for ACC and specify the direction of grain lines.
Bodice with softly intersecting folds of the drapery (figure 438). Two pleats begin at the shoulders and crisscross in the middle of the front; the right crease continues to the left tucks from the waist line.
Draw a smooth line folds (figure 439, the dashed line on the left).
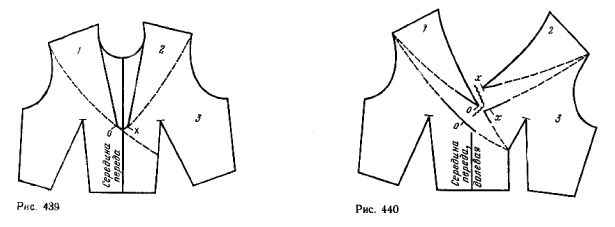
On lines drawn from the extreme point of shoulder, falls soft curved pleat (see figure 438) due to the convex shape of the shoulder and chest. Starting from the middle of the front, put this line on the right side of the patterns.
Mark the width of the strip neckline on both sides of the line of mid front at the point of intersection of the lines of the folds (see figure 439, the notch x and o). Swipe to the neckline.
Number and cut of the patterns and extend them so that between the parts 1 and 2 formed sufficient seam of vrachevanie strips, and between nasecki x, x and about, appeared extension, equal to 6-8 cm (figure 440). Cut the pattern along the line of the left tuck and rotate the part 3.
To make the folds were gently draped, it is impossible to attach one to another, you need to otkroite the lining of part of the bodice between the tucks from the waist line, bounded from above by the level crossing of the draperies.
Bodice with draping at collar. Collar, slightly retarded from the neck (figure 441, a — front, b — back), is being implemented in the baseline template.
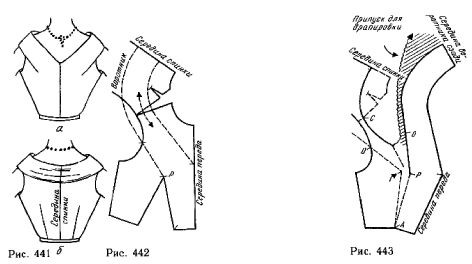
Put it next templates front and back, connecting them along the lines of the shoulder sections, then open them from the neckline to the distance required for the gap of the collar from the neck (figure 442). This distance is 1.5-2 cm
Spend the dashed lines of the collar. Mark the width of the straps of the bodice, starting from the line of the shoulder cut (dashed line arrow).
Put on another sheet of paper in front of the bodice and the collar to mid-back. To close the tuck, secure both curves at point A (figure 443) and rotate them around 1-2 cm at the level of a point P (see arrow).
Draw the neck back into the collar through the point C and continue it on the shelf, as shown in figure 443, i.e. midway between points O For draping collar of the back side will provide extra width departure collar (hatched part).
The lower collar should carve out the patterns on the top of the collar. It should end at the point R.
Connecting the upper collar with the lower need from a point About leaving a portion of the collar between the points P and About free to from point R, he lay in a soft tuck.