")
Speed depends largely on the rationality of the processes of implementing some of the actions that can be considered as a component of operations or types of work. We present here a description and photos of the next steps of sewing almost any of the products encountered professionals and Amateurs:

- refill thread and tying a knot;
- cutting edge components;
- implementation of the notch;
- namely lines on the fabric;
- shear fabric with pins.
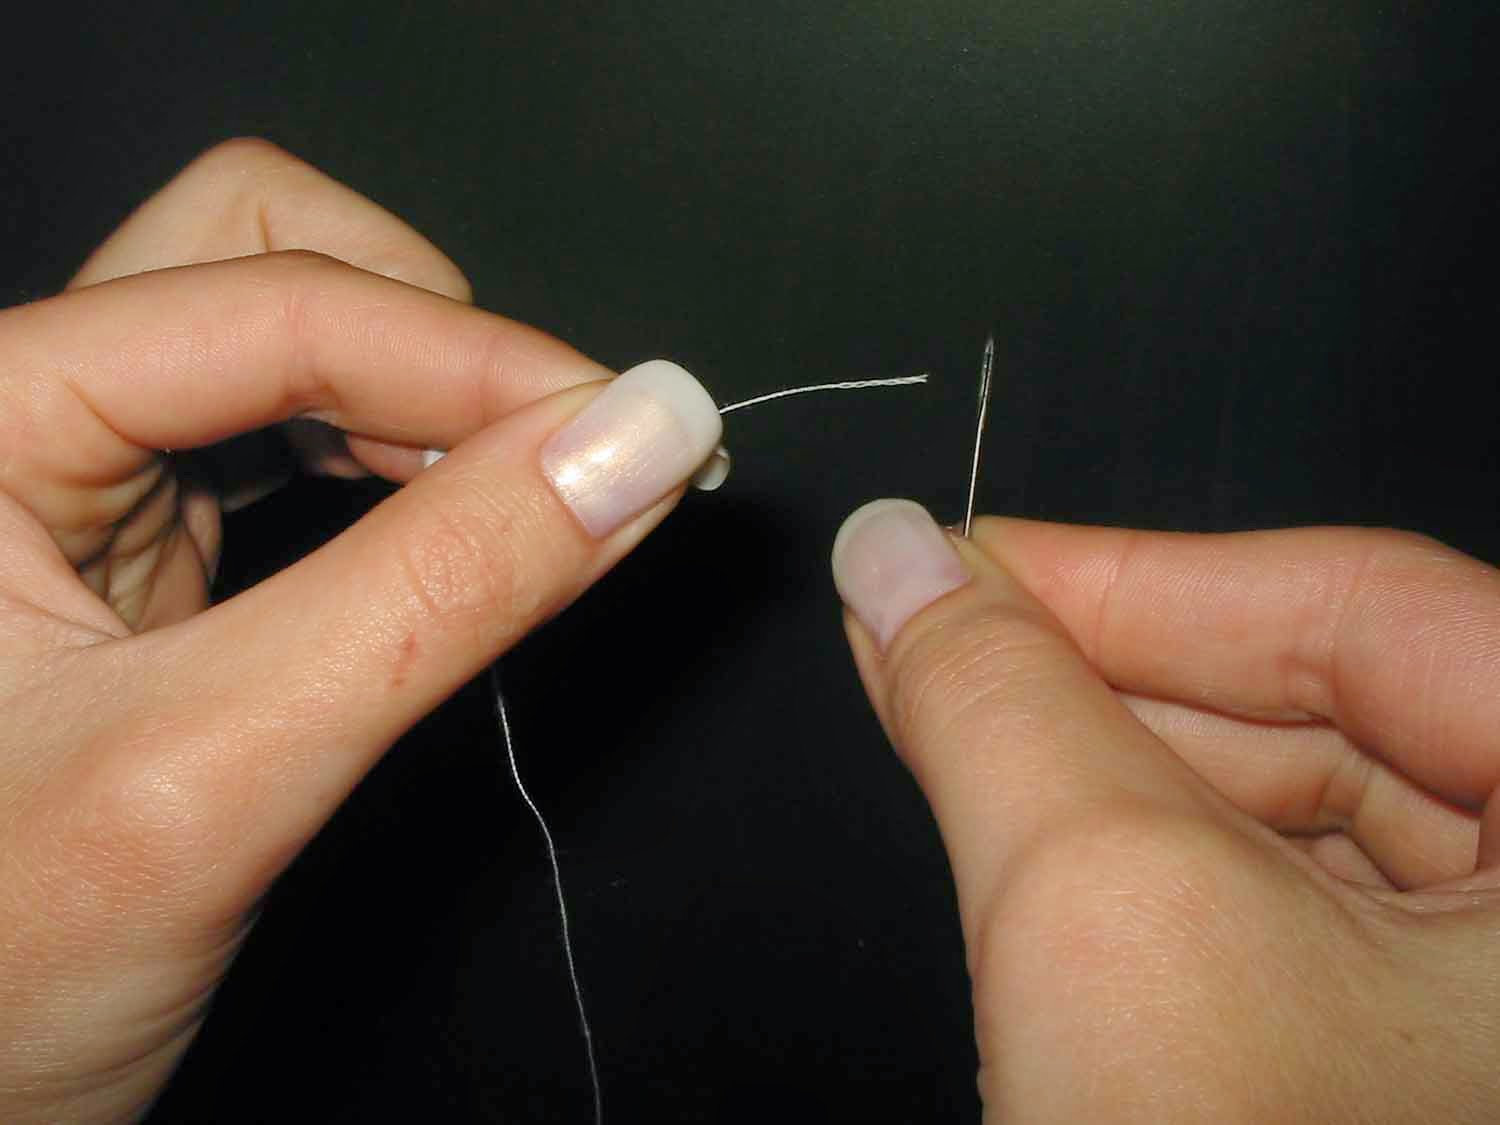
Filling thread in the needle and tying a knot the Needle is in the right hand. The thread is held with the tip of the thumb and forefinger of the left hand and moves so that the end of the thread entered the eye of a needle.
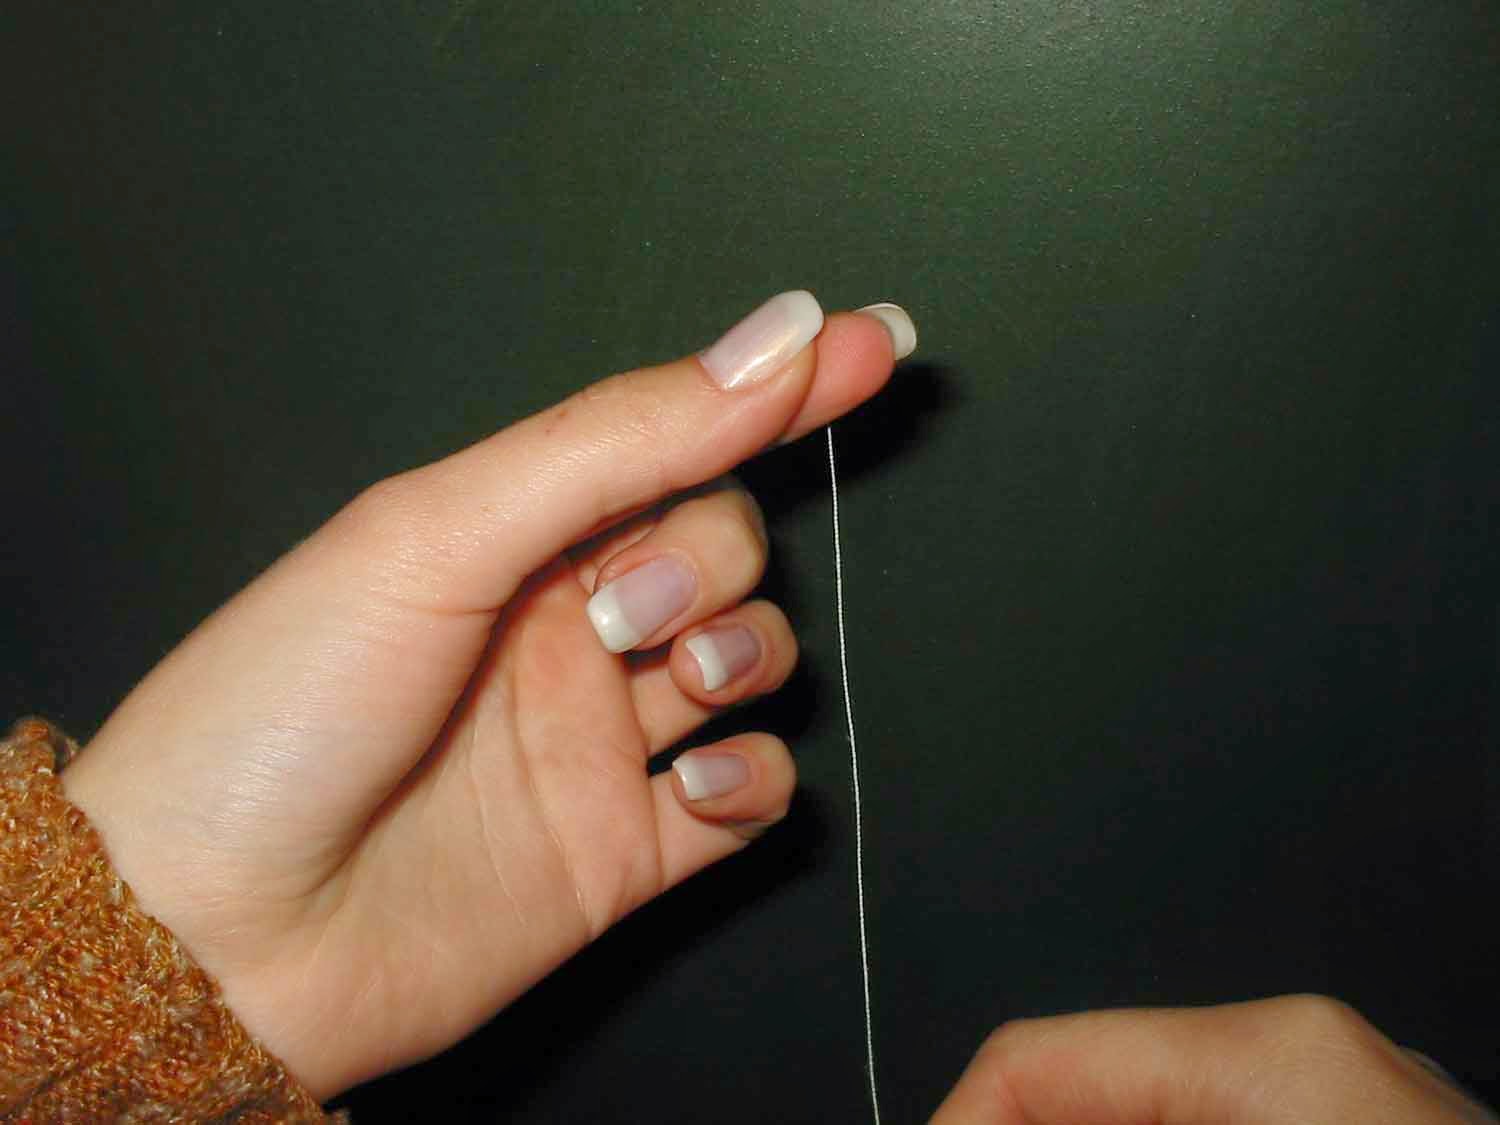
The end of the string on which to tie the knot is in his left hand and held the tip of the thumb and index finger. The free end of the thread is in the right hand and encircled around the index finger of the left hand.
After the formation of the loop from the free end of the string she pulled - that is, the excess thread.
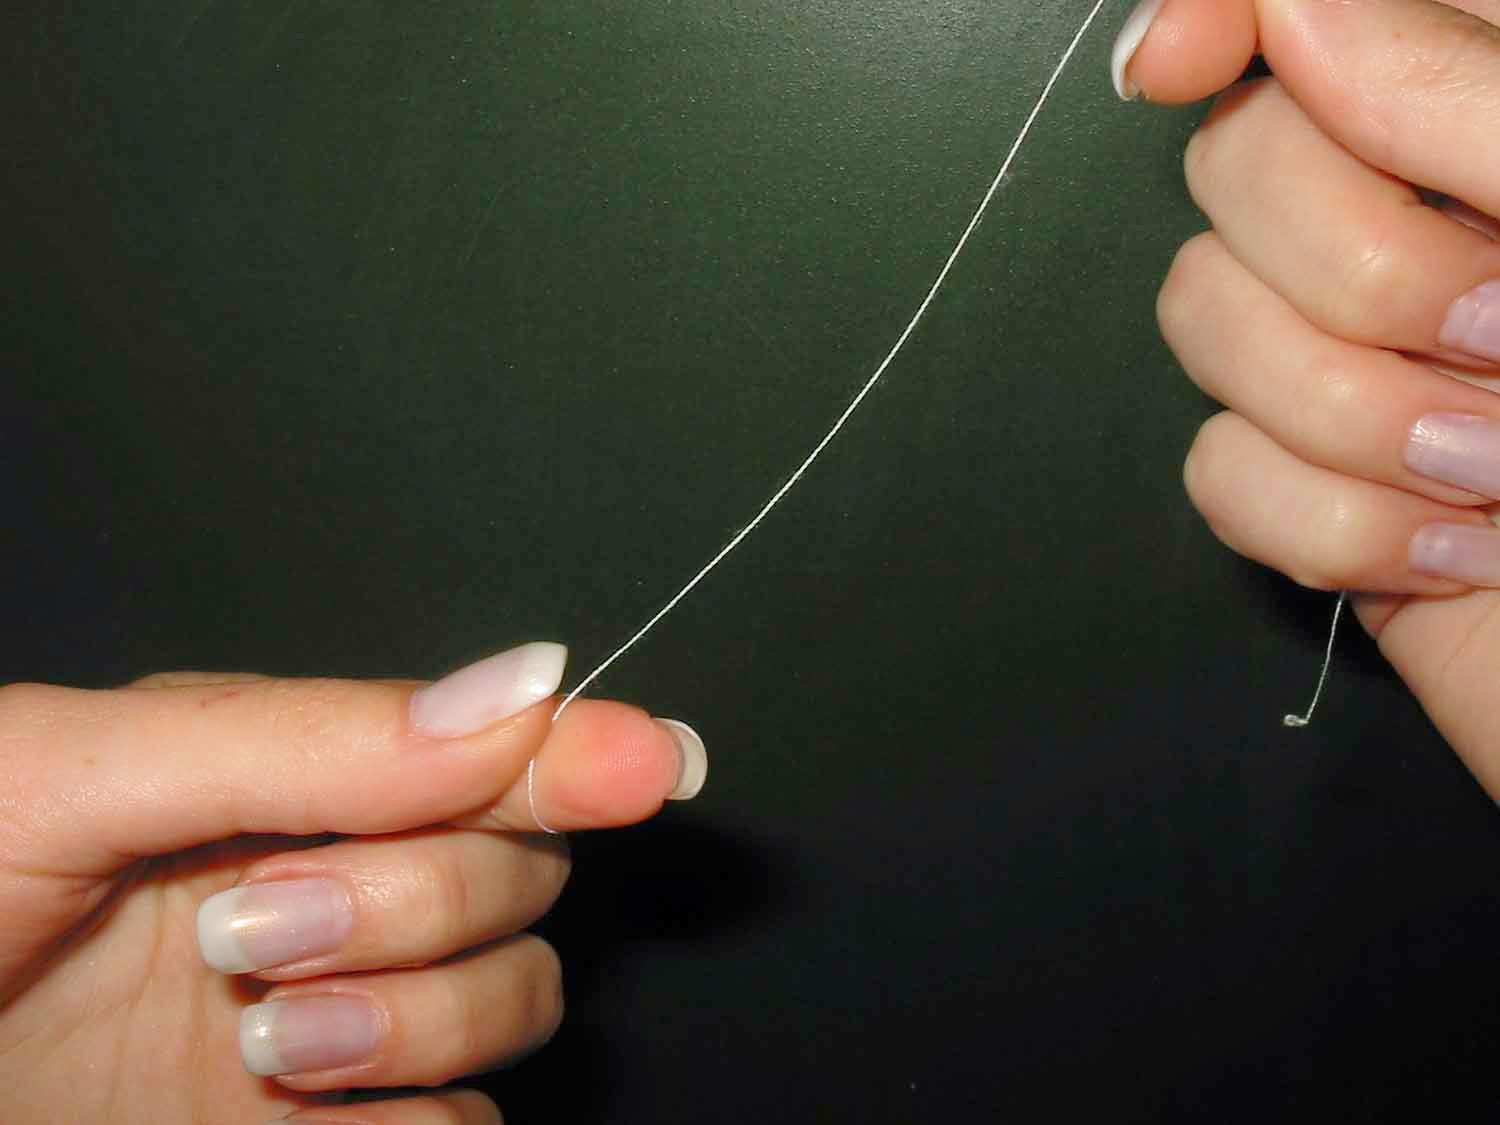
Right hand thread gergevets with the index finger of the left hand. At the same forefinger and thumb is twisting thread. Tension of the free end of the thread is tightening the knot.

Trimming the edges of a part having a line for trimming details on the front or reverse side. The product/part is on the table. The cropping region is in the left hand. Scissors held in the right hand, produce cutting.
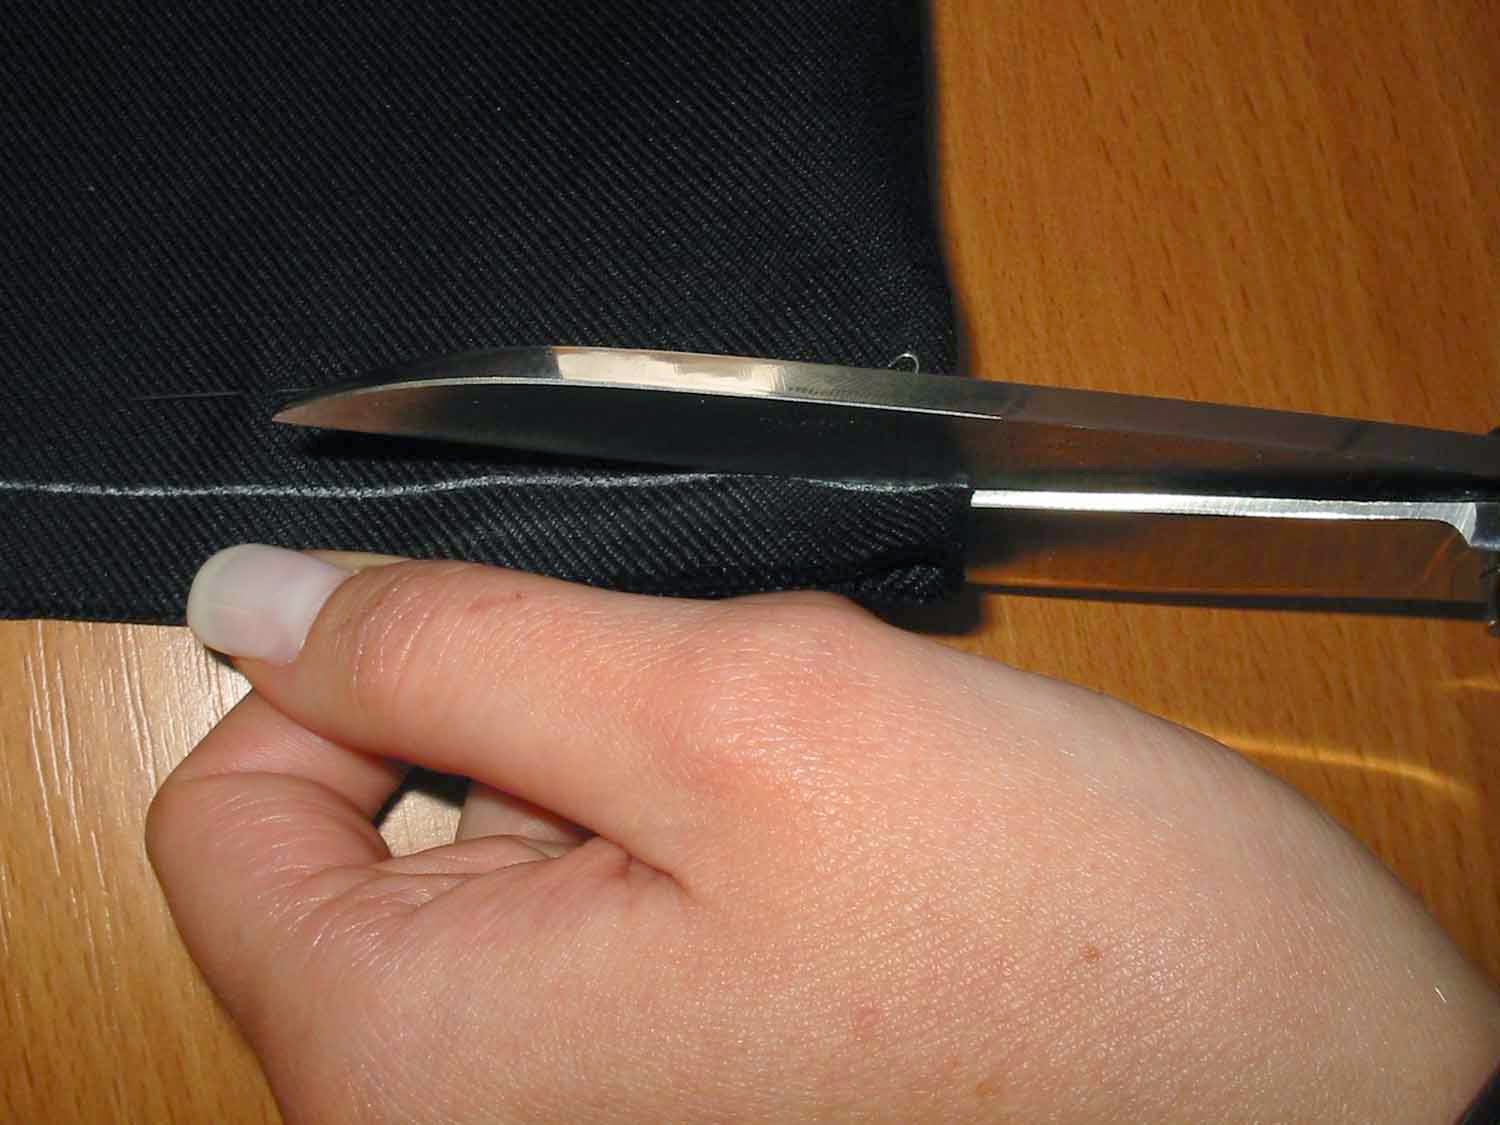
At the same time: - the cut is made the middle part of the blade - the blade not fully closed, the lower blade of the scissors touches the table.
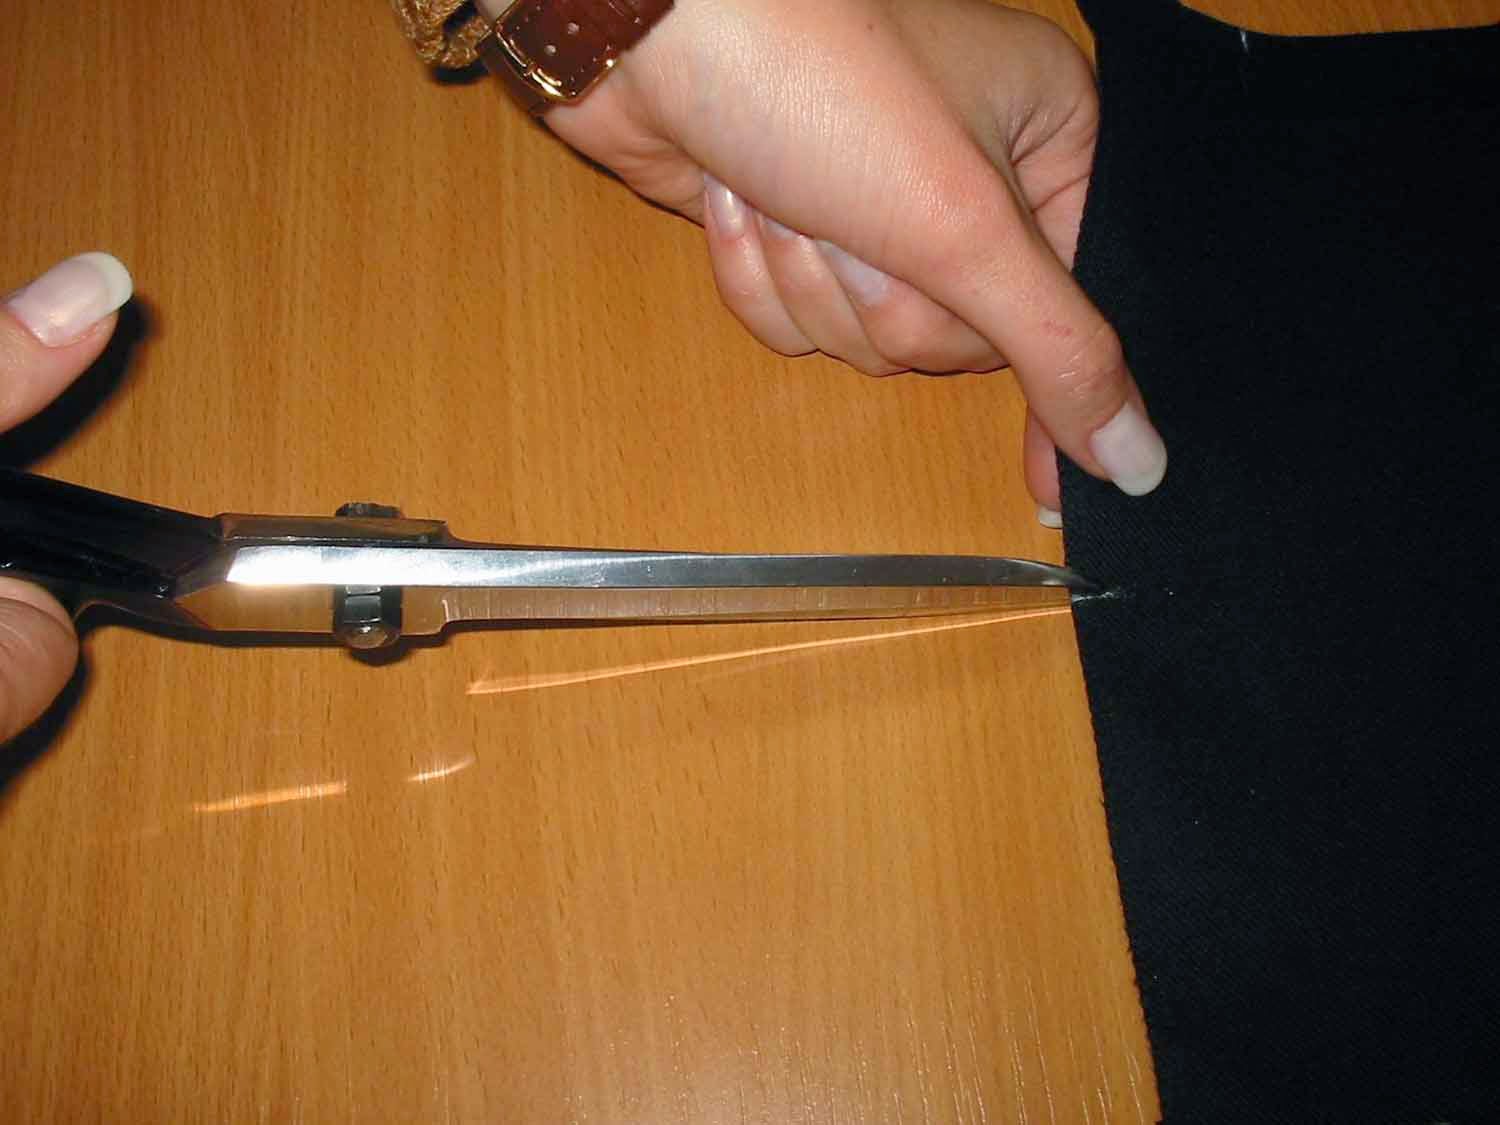
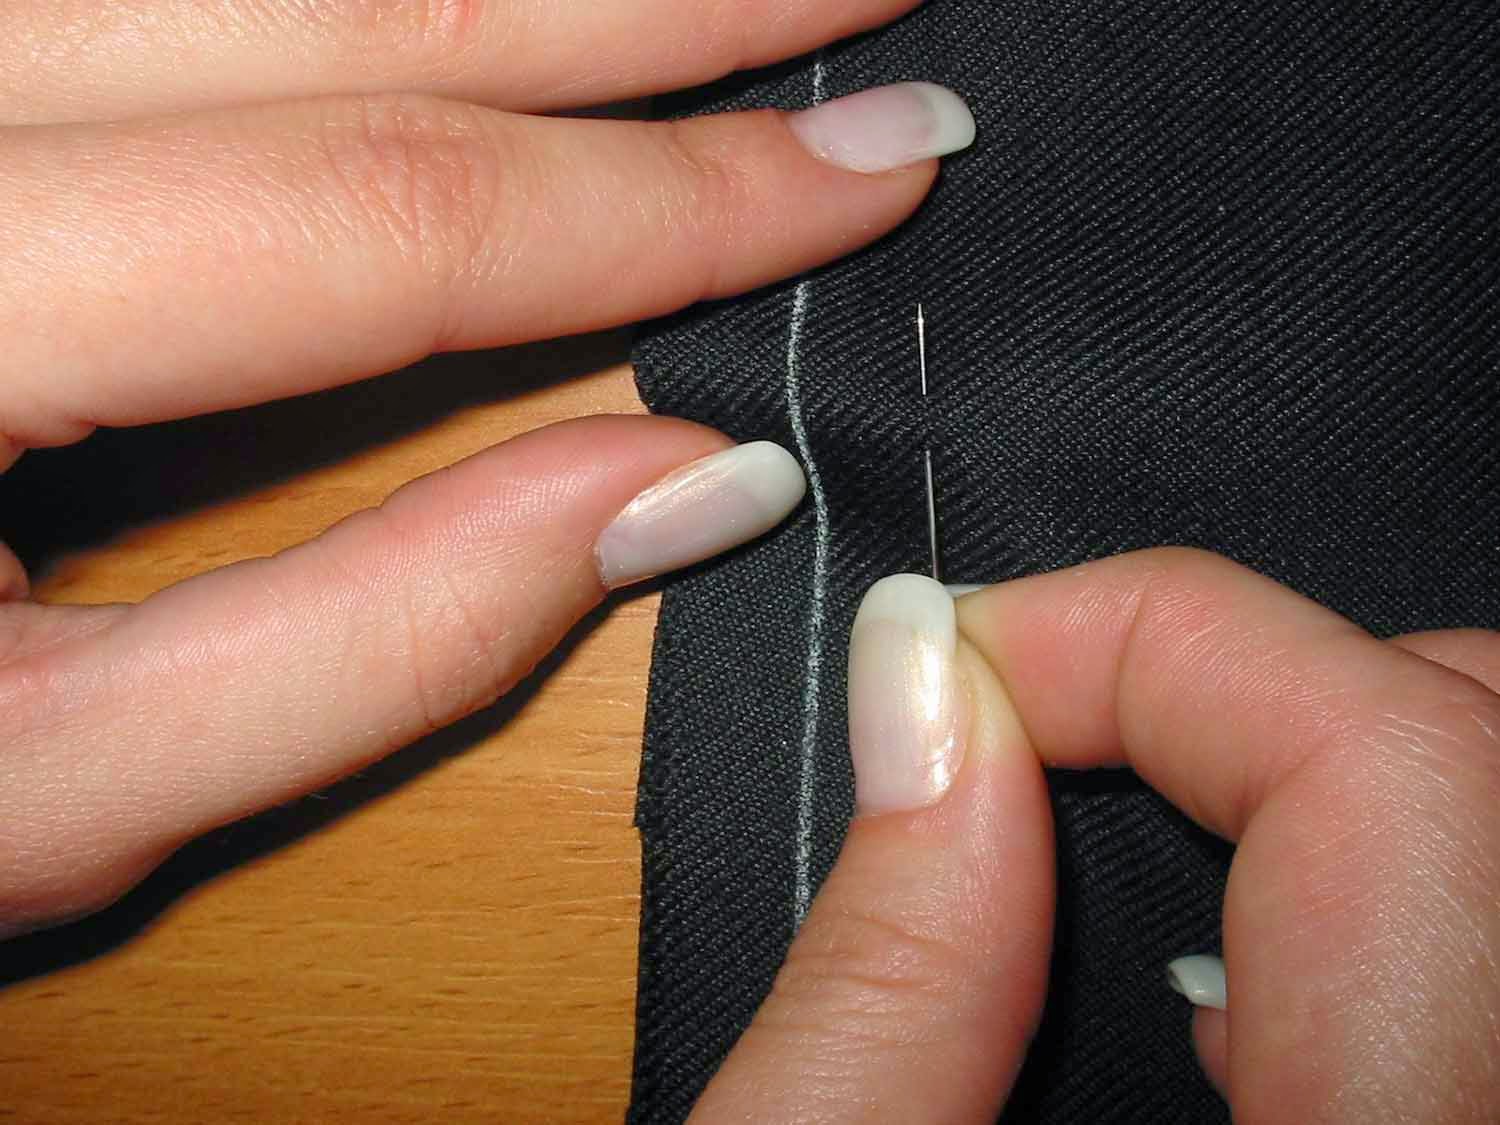
Implementation of the notch the location of the planned nasechek chalk or manual stitches. The detail is cut to a running. Nadechka is perpendicular to the cut depth of 0.3-1 cm (depending on the type of material and the role of the notch) with the tips of scissors.
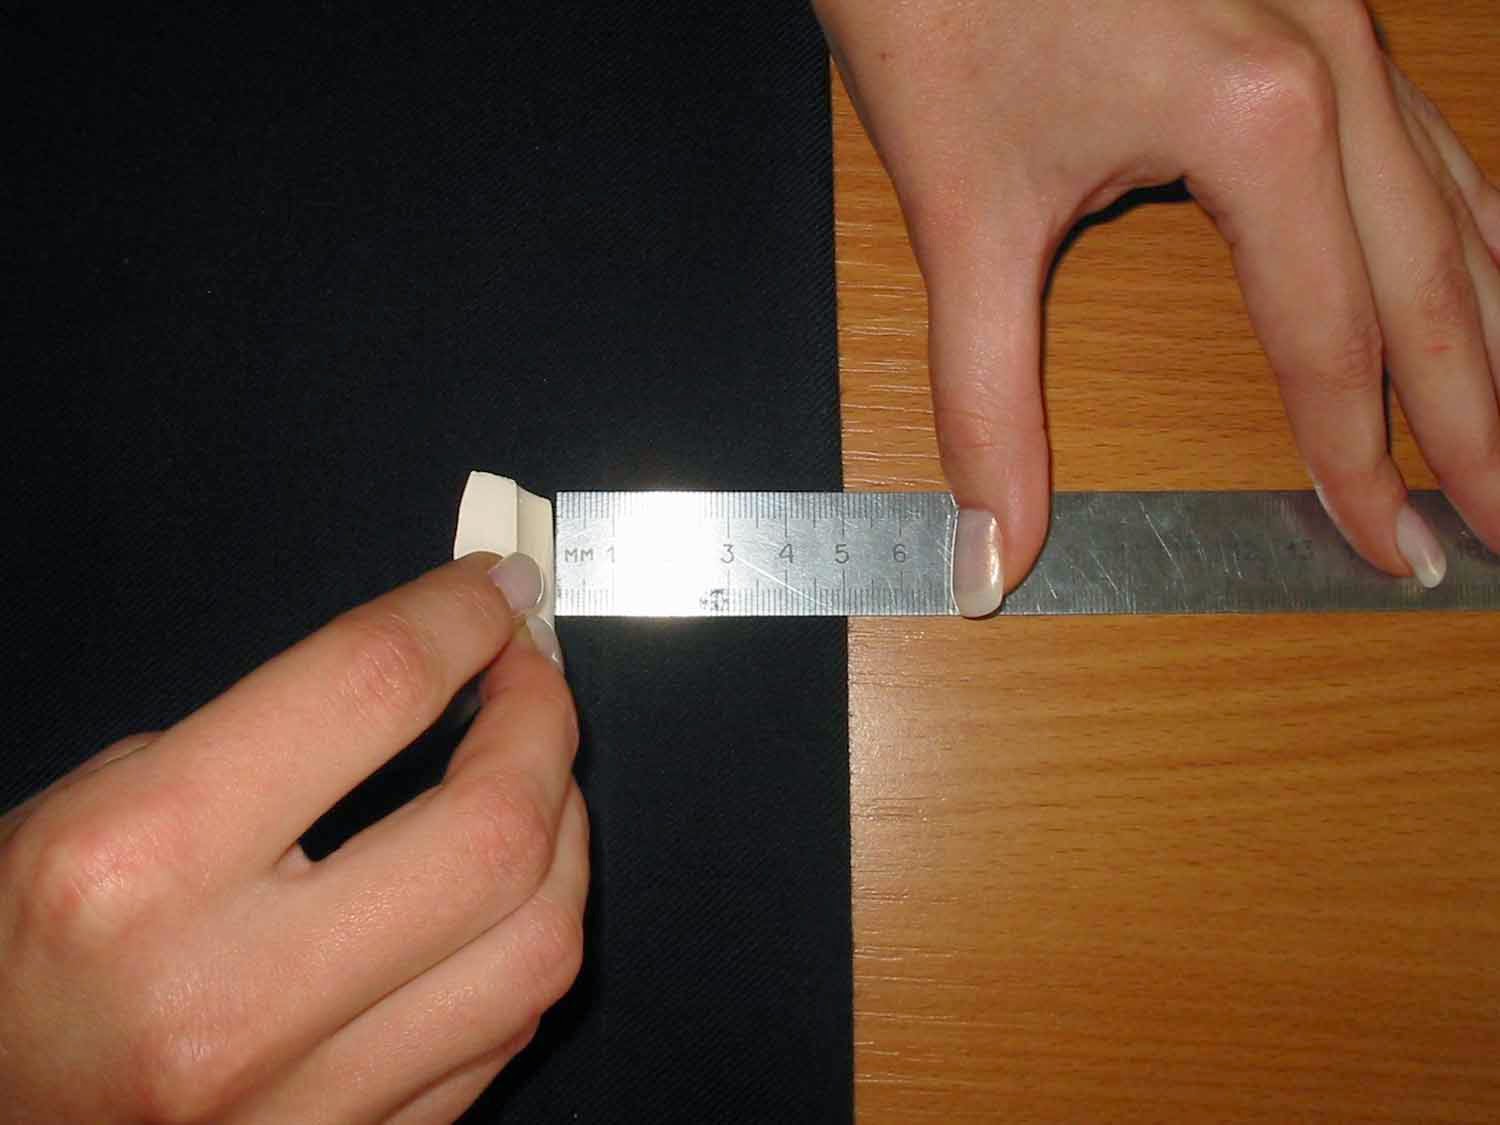
Namely lines on the part From the edge marks the required distance with a ruler. It should be note that the measured distance is recorded on the two scales of the ruler. Ruler firmly pressed to the fabric perpendicular to the slice. Mark runs a sharpened chalk base line.
The line is placed exactly on the marks, pressed tightly with his left hand to the part. Sharpened chalk performed a continuous thin clear chalk line.
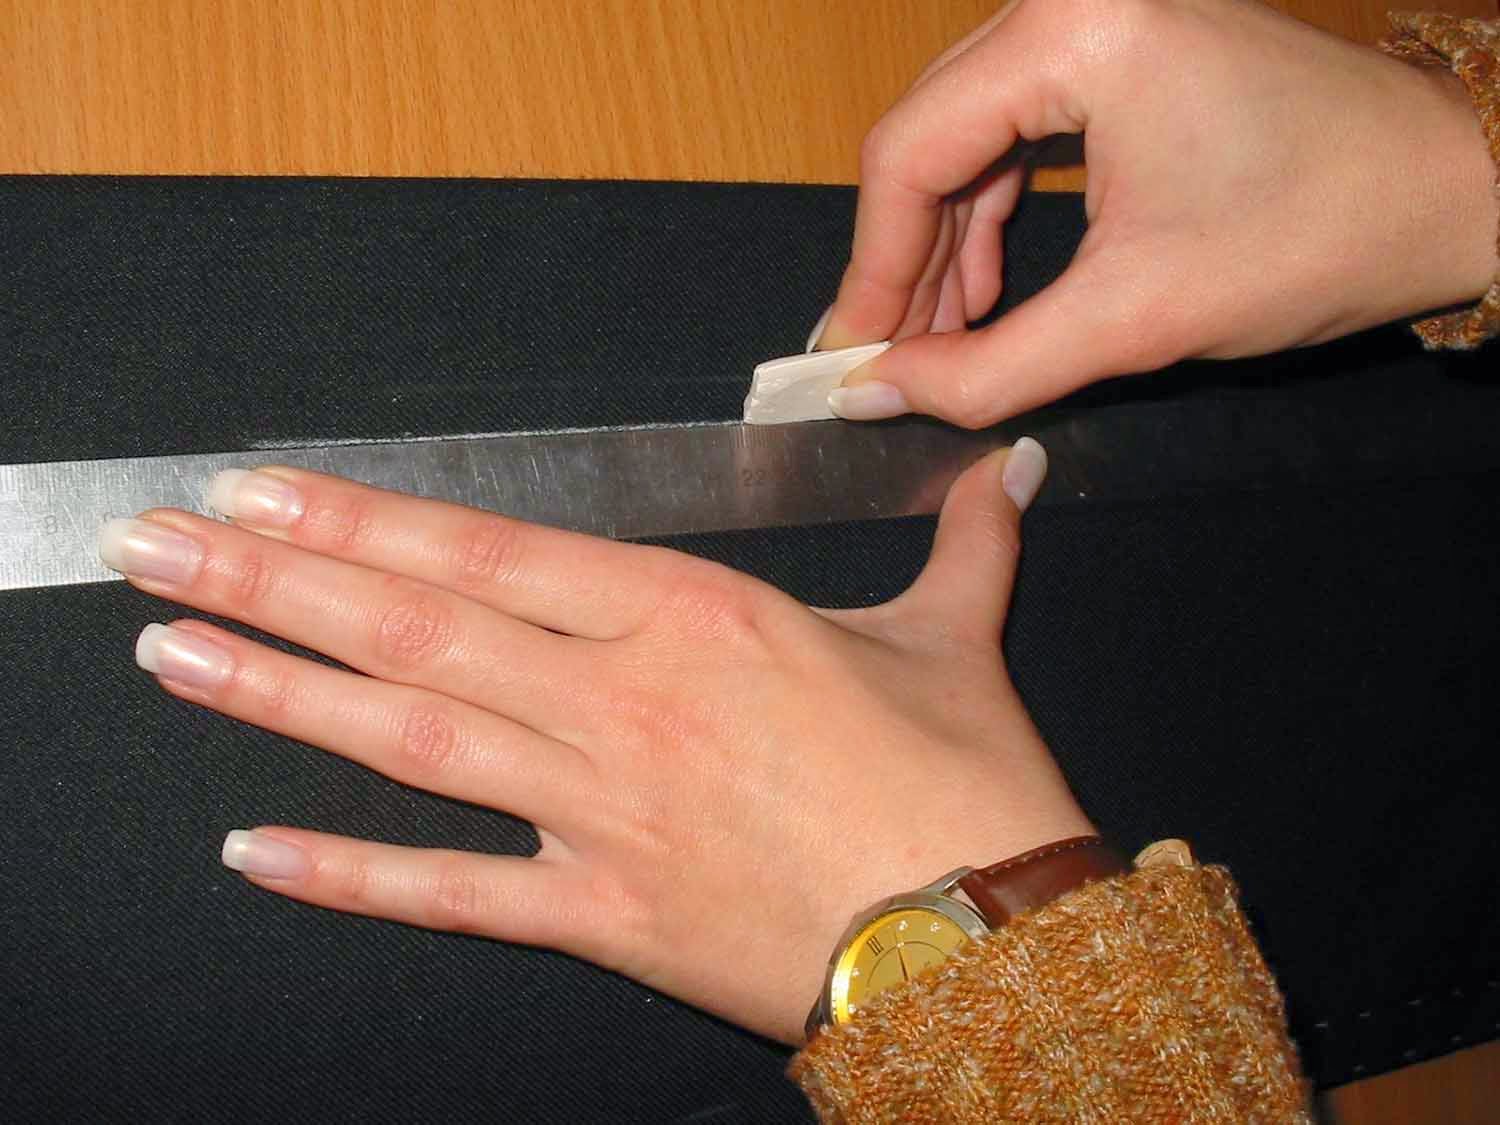
Line thickness not exceeding 1 mm, the line must not allow uncertainties or require podelki.
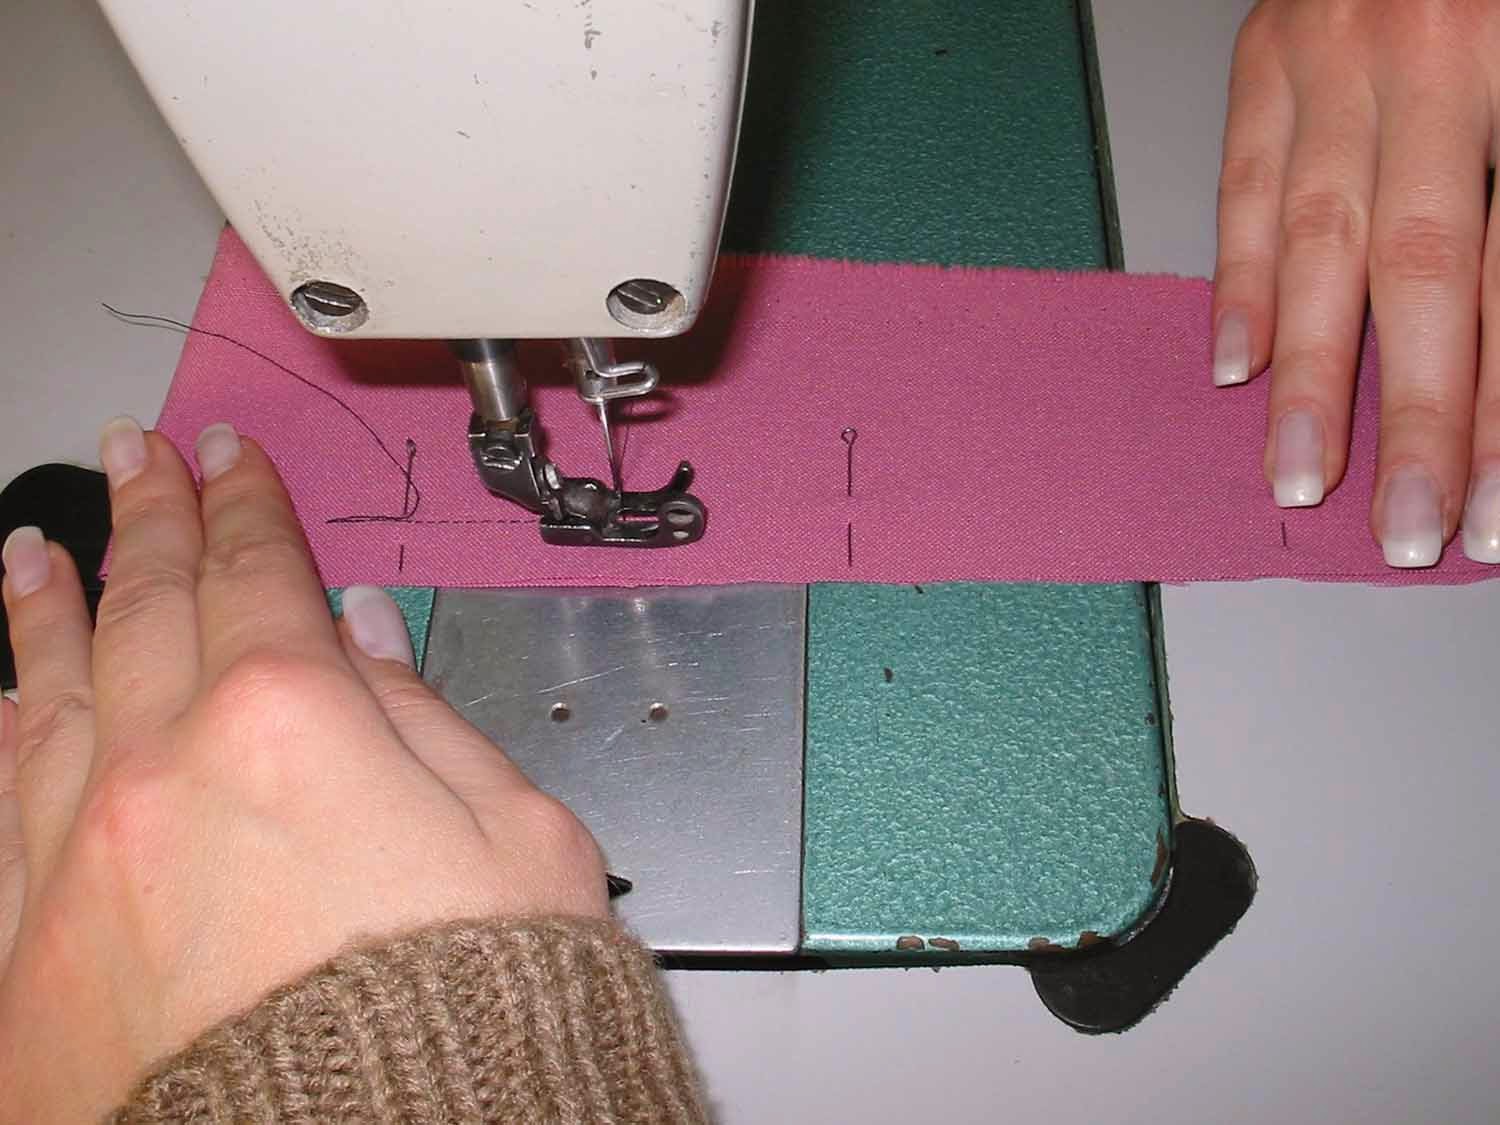
Chipping of parts of the pins Shear details for further pruning (refinement), transfer lines, smachivaniya is along the lines of post-processing 0.5-1.5 cm from it.
Chipping of parts for further grinding is performed across the line of post-processing 4-5 cm, the heads of the pins from the cut edge/edge detail.