


")
Attaching flat buttons with 2 holes is as follows:
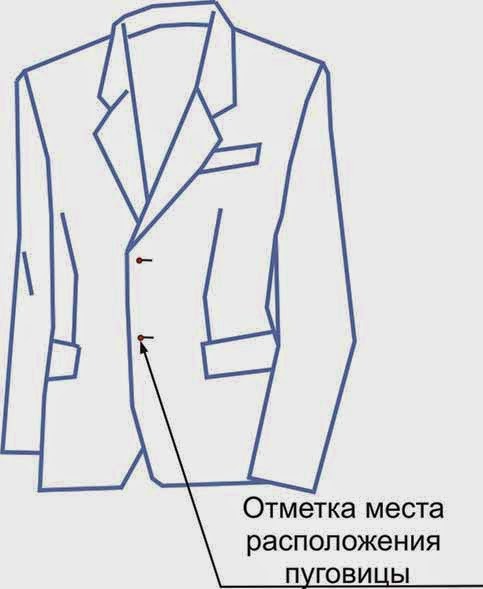
1.The proposed location of the buttons.
To do this, put a dot or a cross on the front side of the product tailor's chalk or marker. You can focus on the punctures, remaining on the fabric, if you sew a loose button. If you sew a button in the new, self-made product, it is necessary to focus on the location of the hinges. The edges of the fasteners should be located so as they will be placed in the socks. Marker or chalk to put a mark in front, middle to the middle of the edge loops.
2. Sew on buttons.
For this first puncture of the fabric running from the front side in the intended point. Knotted on the string the knot will later be closed by a button. Pierces the fabric from the inside on the front side, retreating from the previous puncture 1-2 mm. Put a button on the needle one hole, with the second puncture into the second hole and the product, trying to get as close as possible to the point of namely. Do not tighten the stitch very tightly, forming a rack buttons.
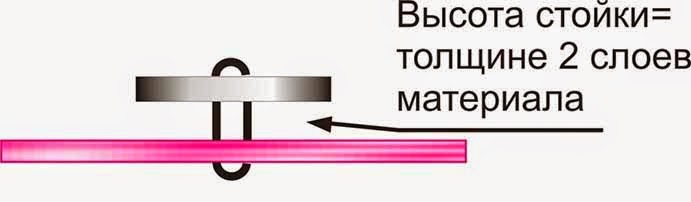
The size of the rack depends on the thickness of tissue products to which sew a button: for coat of 5-6 mm, to dresses and blouses 3-4 mm. So running 4-5 stitches. In this case, buttons should be this picture: 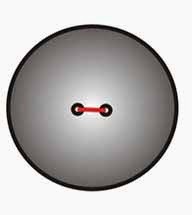
and on the reverse side there should be only one neat point.
3. Obviam rack. Not closing thread, sewing buttons, and display it using a needle between the button and product.
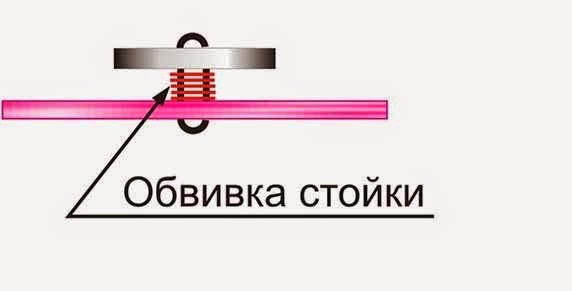
Evenly obviam rack, making sure that obuhivka not "accumulate" in one place an ugly thickening. The rack must be uniform, dense and durable, but not too hard. 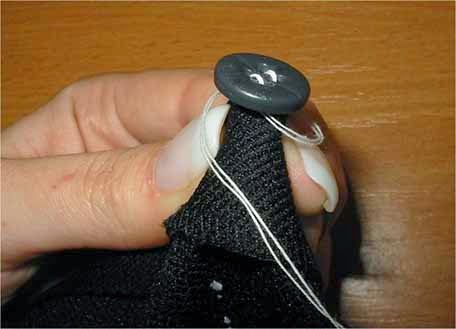
On the last two threads form a loop, which hold a needle and thread to tighten the knot. The last puncture of the needle being performed under the counter buttons. Bring the thread to the back side and carefully cut with scissors. 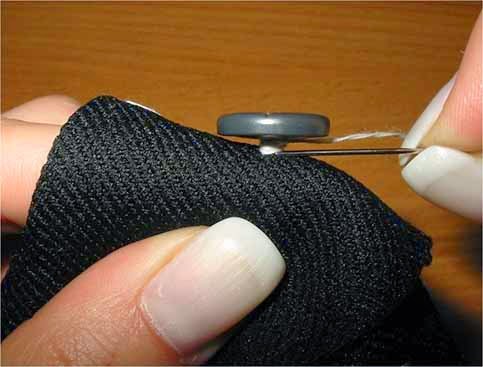
Differences in sewing flat buttons with four holes are that you can run multiple sewing options with a different pattern stitches between the holes.
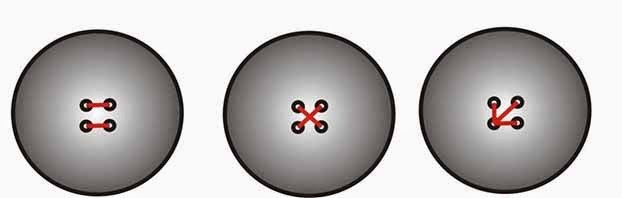
Thus in each pair of holes should be 3-4 stitch. All rules for the implementation of stands remain. When sewing to the product buttons, which will not be used to fasten, i.e., perform only an aesthetic function, beautify the product, rack is not perform.
And last. As a rule, flat buttons sew thread color buttons to stitches was less noticeable. But fashion does not tolerate boredom, and sometimes sewing contrasting thread can become the highlight of the product.
Select your language