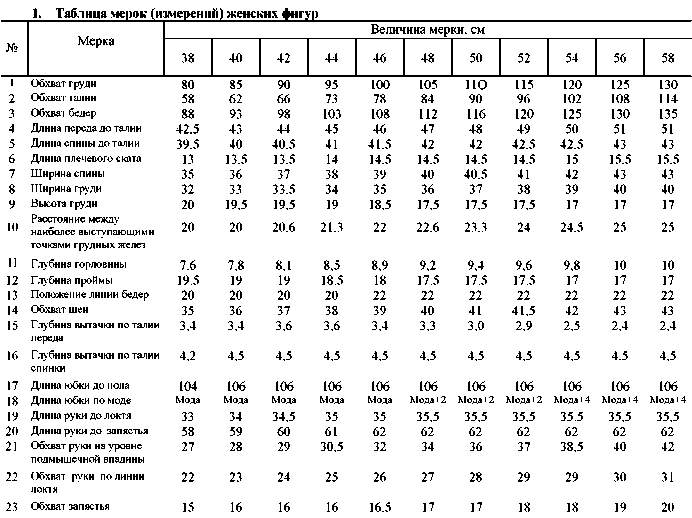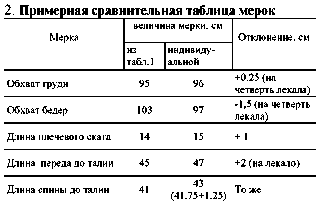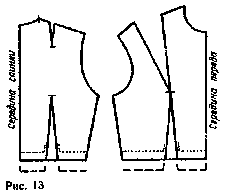
 To change the length of the bodice equally on the front and the back parallel to the line of the waist lengthen or shorten the bodice according to the desired size (figure 13); the dotted line indicates the shortening of the bar— elongation. Measure the resulting width on the waist line. If it is necessary to preserve the measure of waist girth, scheduled for a basic template, to a new waist line carry the same depth of the recesses and the width of the bodice at the waist line.
Changing the length of the bodice on the front or the back can be caused by an imbalance between the two sides figures, and not the presence of an elongated torso, as in the first case. Therefore, it is necessary to change the length of the bodice from the shoulder cut.
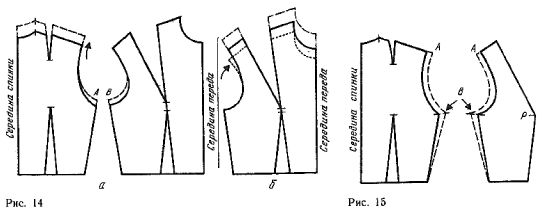
To lengthen the back of the bodice (for the product on a hunched figure) set on a sheet of paper drawing. Move to the desired height of the neckline and shoulder cut (figure 14, dashed line ). Continue up the line of openings . Measure the extent of increased length of the new line of the shoulder cut, and, consequently, increase the solution you shoulder rides. Often you want to extend the bodice at the line width of the back. To restore the line of openings the basics you need to point A and In the openings to move at half increase or decrease the length of the back.
To lengthen the front bodice (for products on pereghibati figure) after the transfer line of the shoulder cut of the neck continue the line of the armhole (figure 14, b, dashed lines ). Measure the length of the shoulder cut and, if necessary, increase the solution tuck accordingly to increase the length of the shoulder cut.
To shorten the front bodice should reduce the solution tuck or increase the length of the shoulder cut, as indicated by the arrow in figure 14, b (see dotted lines).

To increase the length of the line of the shoulder cut, should continue the line side of the openings, and to clarify the last, from the level of measurement of the width of the back. Increase the width of the back and the front causes movement of the armscye curve (figure 15). Move parallel to the line of openings for the value added to the width of the back and the front (points A and b ). Point To draw a line with the point of intersection of the side cut and the waist line. Products in the straight cut swipe through the points To the straight lines parallel to the line side of the slice.
Increase the width of the back and front given way allows to save the form of line and armhole.
To increase backrest width: increase the length of the shoulder cut and the width of the back as described above. Then increase the solution of the shoulder tuck by the amount of gain to the shoulder cut.
To increase the width of the front in the drawing is possible using one of three ways: spend less curving of the openings between the same points on the drawing fundamentals of the bodice; to increase solution top tuck on the value of the segment added at the shoulder line of the cut after the extension of the transmission method indicated by m on figure 15; in this case allowance for the line width of the breast somewhat reduced; to extend the front, as shown in figure 15; then cut the neck off the excess, added at the shoulder cut.
To reduce the width of the scarf along the lines of waist and hips it is necessary to distribute the excess width of the scarf and tuck at the waist line of the front and side sections of the front and back .
The increase in width of the scarf at the waist performed by reducing solutions of Darts at the waist line gave the Darts in the side sections. Darts at the waist line of the back left unchanged.


