")
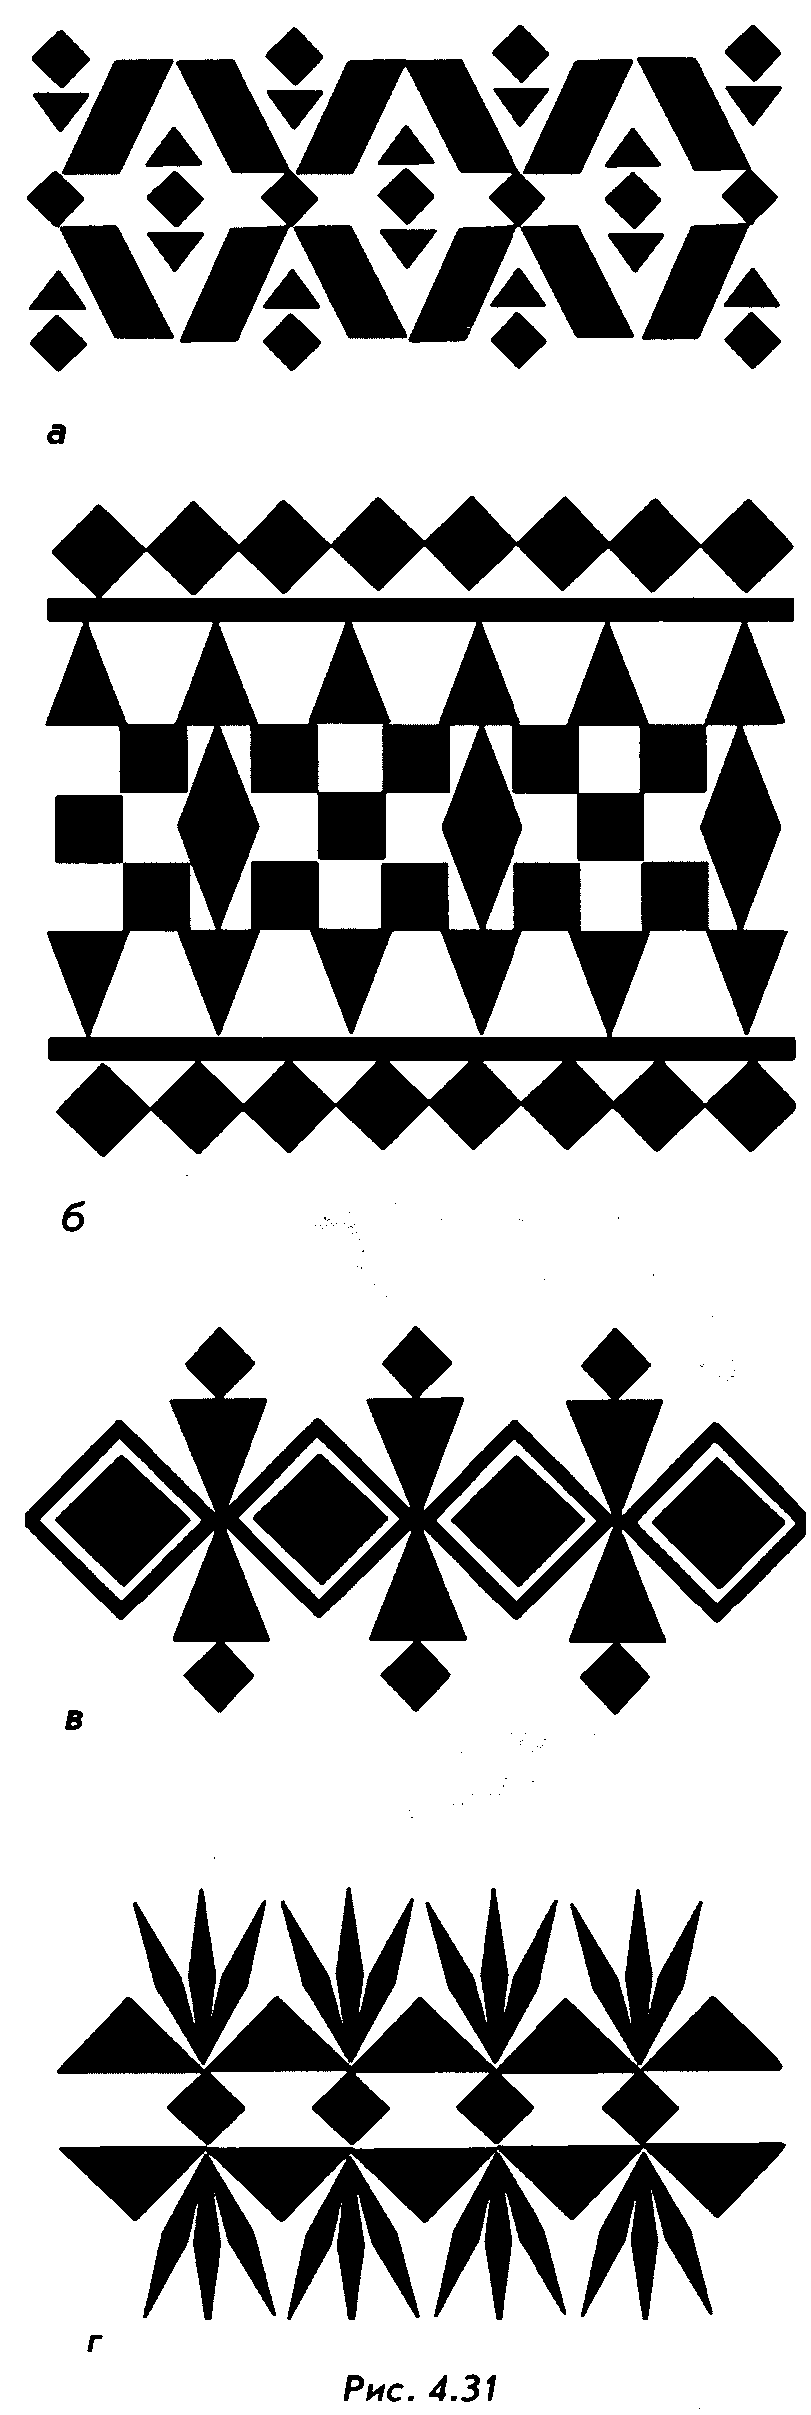
Unlike chains curbs have a more complex composition. They can include motifs that are rhythmically repeated throughout the length (figure 4.31, 4.44). The composition of the borders are often multi-tiered, complex rhythms. Borders can gain three or four different elements (figure 4.32 a and 4.33 a)
Fringe — a kind of curb. It is decorated with the sides of the lids of boxes, trunks, frames.
Fringe is by a combination of individual geometrical elements constituting the basic pattern, and should by their nature be consistent with the overall artistic vision of the product. The border can be as complex character set and simple — from the same repeated elements around the perimeter of the product or a certain plane. The pattern can be between two parallel strips of straw or two zigzag lines.
Consider a few examples of a set of borders is given in figure 4.31.
The sequence of execution of work should the above algorithm. When you develop a complicated sketch of the border you need to use the millimeter paper, which allows you to determine the proportions and size of the items and make accurate markings on the surface.
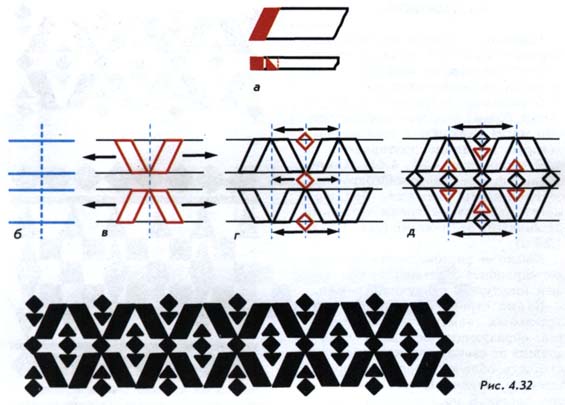
Border (1st option) (figure 4.32). The composition is based on a rhythmic alternation of parallelograms and additional elements from squares and right triangles (figure 4.32 a).
Materials:
4-5 strips, 10 mm width and 3-4 strips 4 mm in width. the Length of all tapes 15-18 cm
Execution of the work.
1. Will produce a marking plane (figure 4.32 b). Draw a vertical axis of the curb. As can be seen from the sketch, the main elements are parallelograms, which are located in two tiers, the distance between them is defined by the diagonal position of the square. The curb will be located in three main tiers. The distance between the lines 1,2 and 3,4 is equal to the height of a parallelogram (figure 4.32 a) and is 10 mm. the distance between the lines of 2.3 is equal to the diagonal of the square (figure 4.32 a) is 5 mm.
2. A set of border start by making a chain of parallelograms, right and left of the vertical axis (figure 4.32).
3. According to the sketch, add a border squares (figure 4.32 d) and triangles (figure 4.32 d).
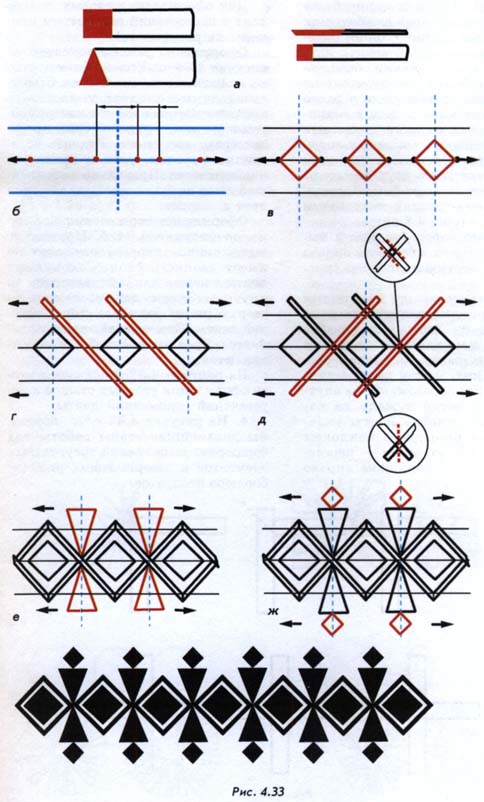
Border (2nd version) (figure 4.33). The elements that form it are shown in figure 4.33.
Materials:
4-5 strips of width 8 mm to complete large squares; 3-4 tape width of 12 mm to perform triangles; 2-3 tape width of 4 mm to perform small squares; 7-8 tapes with a width of 2 mm to complete the grid. Length of all strips 15-18 cm
Execution of the work.
1. Perform the layout of the plane. Draw a vertical axis. The drawing border is formed by the elements which touch each other. Performing the basic elements of the border, we set the position of subsequent elements. Define to mark the border of three lines (figure 4.33 b). The middle line will serve as a guide for the large squares, the two outer lines will determine the position of the mesh around them. On the middle line dots indicate the position of the large squares (it corresponds to its diagonal and equal to 12 mm). The distance between adjacent squares should allow between them lay a grid of narrow strips of straw, and thus must remain on both sides of the mesh skylight of the background to 2 mm. Determine the distance between the squares is equal to 8 mm (figure 4.33 b).
2. Start set the curb with the execution of large squares to the right and left of the vertical axis (figure 4.33).
3. Run between squares of a grid of thin straw strips (figure 4.33 C, d). Lay the tape obliquely, parallel to the sides of the larger squares, at equal distance from them. The length of the ribbon count so that the inner corners of the mesh lying on the guide lines. Tape lay in pairs: two with a tilt to the left (figure 4.33 g) and then intersect them with the slope to the right (figure 4.33 d).
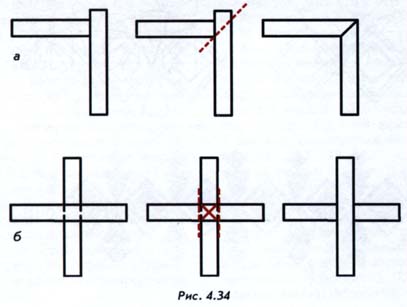
For making angles of the strips and overlaps, consider the examples in figure 4.34.
The design of the area shown in figure 4.34. Area at the junction must have an oblique cut. The abutting tape should be laid overlapping. Then working tool it is necessary to do an angular cut, cutting two strips. To remove the trimmed pieces, corners lapped to the surface. A properly made joint will have overlapping bands and gaps.
The design of the intersection is shown in figure 4.34 b. Correctly executed intersection of strips has a double layer. Straw tape is first wrapped with one another. Then the tape lying on top, cut along the sides of the bottom of the tape. The clip element is deleted. The edges of the split tape lapped.
Figure 4.33 d shows the design of corner joints and intersections of straw ribbons.
4. In figure 4.33, e, f shows a further stage of work on the border: the implementation of triangular elements and the final drawing of the border squares.