")
Skin treatment can be restorative and decorative. The restoration is subjected to a primarily leather from old products: it is necessary to return the "marketable". This sewn leather products strut or cut along the seams. Soiled wash with a sponge and soap. Wipe dry, paint over small scratches and scrapes. This can be done with aniline dyes or marker. If the skin is worn over large areas, it is better to repaint it with nitro paint for the skin or use as a facial its reverse side (the flesh side).
Cleared and tinted the skin grease with glycerine and remember hands, that it is better absorbed. The skin creases or crumpled water, if necessary, wash with soap and drag on the Board or on the plywood; fasten edges small nails or buttons-studs. Upon drying, leather will shrink, so it is necessary to periodically interrupt cloves (perekleivat button). If this is not done, holes from the nails will be drawn out and on the edge of the flap formed holes. In the process of drying the skin is recommended to lubricate with glycerin or cream for greater flexibility.
Old purses and wallets also need to rip at the seams. If they were designed on the edge of the braid, try to keep all the holes they can be necessary when using a skin in a new way. Sometimes it is enough to restore the appearance of skin and parts to get a brand new product. The parts are washed with soap and water and dried between pieces of dry cloth under the pressure. Fabric periodically change.
Large leather items are obtained from Galenia boots. At the same time to rip a seam is not always appropriate.
Out of fashion the bag can be modernize with new, trendy items and to add other materials, such as fur. Differently placing the belt on a men's bag business card, and adding a decorative ornament that easy to turn it into an elegant purse.
Decorative treatment of the skin very much. The easiest way is staining in single or multiple colors with smooth transitions or clear boundaries colored spots.
In the absence of special nitroglicerina for skin you can use homemade paint refills for ball point pens. The rods of different colors are cut, laid out by color in a small feel and fill with acetone; shaken periodically. After a few days the paste is completely dissolved in acetone. The resulting dye is best to handle small pieces of skin, especially in the quality of the sample. Large sites are difficult to paint evenly.
The finished product is coated with varnish. You can just make a colored lacquer, adding in improvised colorless dye. The paint should form a thick layer, to Shine. The latter is possible only in decorative products that will not undergo deformation.
Automotive paints in aerosol dispensers can be painted with skin as smooth and in the technique of the stencil. Using a traditional stencil, cut out the cardboard or plastic figurines and painted the skin through the hole. Or Vice versa, is applied to the leather detail - for example, for the next earring - small items clear shapes: circles, rings, sticks. After coloring on the earrings appears in the picture.
Impressive is the figure obtained by applying to the skin of various plants, such as fern leaves. The leaves are beautifully arranged on the plane and sprayed with a dye, trying to alternate more saturated color space and less saturated. This pattern can decorate the cover of a book bag.
Widely used in the design of the skin baby unit for burning. They can be applied to the skin both simple patterns and complex black and white composition.
Popular design in the technique of hot batik. In a water bath melt the piece of ordinary stearin candles and brush applied to the skin drawing. Effective is the technique of "dry brush" when visible trace of the individual strands. For this stearin brush on gaining not much. Previously it is advisable to practice on unwanted pieces of skin. After applying the wax the skin is covered with aniline dye (sold in hardware stores for dyeing fabrics). The dye is pre-diluted according to the recipe on the package. Also as a dye you can use colored ink.
After application of the dye the skin dried. The product obtained pattern is the original skin color on a background color of dye.
If you think multicolor pattern, work is conducted in the following sequence:
1. Applied pattern wax on those areas which must remain the lightest - colored skin.
2. Paint the surface with the lightest color (e.g., yellow) and dried.
3. Cause the stearin to the places that will remain yellow.
4. Paint a darker dye, given the mixing of colors. For example, if you put blue dye over yellow, it will become greenish. Again dried.
5. Now the product is visible a pattern of several colors - color, yellow, green. Again apply the wax on those areas that will remain green. You can now cover the product with the dark color - blue, black, brown.
6. Remove the stearin from the surface of the skin. Where it is thick, scrape it carefully - so as not to spoil the surface. You can put on top of the newspaper and quickly to spend it with a hot iron. This procedure was repeated several times. Need to iron quickly and carefully so the skin shrinks. This technique is suitable for thick skin and the skin of medium thickness.
7. For brightening the surface of the skin rubbed womadelaide pastes or colorless Shoe Polish.
Another well-known technique of skin decoration - embossed. For this purpose, special metal stamps with a notched base. Such stamps can be made using nails and screws with different heads. Undermined the nail head, give it the form of a square, triangle, heart-shaped...
Such stamps can be used for colored and colorless embossing. Colorless when heated on the fire notched part of the stamp tightly against the skin and hit with a hammer. The temperature of heating is determined empirically: if it is low, the embossed work of insufficient depth, and if too high the skin will burn. Straight and curved lines is applied, swiping across the skin the blunt side of a knife or heated (with colorless embossed) on the painted foil.
Colour stamping is the same, only additionally cover the skin termoperevodnoy film of the desired color. To make a substitute for such a film, coated with a thin foil (e.g., candy) spread a thin layer of wax, paraffin or stearin. Can be melted in a water bath of ordinary candle. The mass solidified more slowly, add a bit of turpentine. When the wax coating dries, paint each piece of foil tempera paint of different colors. Once devoting time to the preparation of such a foil, you'll provide yourself with material for color stamping.
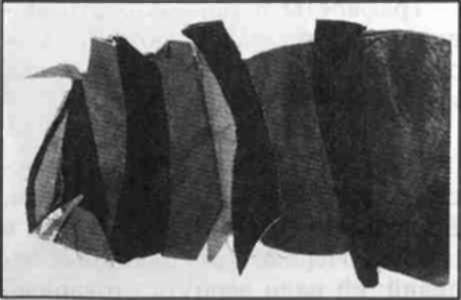
Engraving is used only when processing thick leather belt, for example. First sharp cutter (office or shoemaker's knife) is carried out on all lines of the drawing. The blade is directed vertically, the depth of the notches the same. Then moisten with water the area of skin along the incision. You can repeat the procedure several times so that the skin soaked with water and became soft. Now a tool for the treatment of nails from a manicure set or blunt table knife several times to swipe through the incisions. The edges of the grooves inside of the bend, the cuts are expanded. It turns out a pattern of profound lines. Drying lines are fixed.
To secure the shape and create bending details should singe the skin over an open flame or put on the surface of the hot plates of the electric cooker or the pan. Working with a candle, the product is better to scorch in the lateral part of the flame: it is less zacopride. Using quality leather to bend in the direction of greater heating, it is possible to give the details of the various curves of the petals and leaves, natural shape, circles with a bulge; round detail take a hemispherical shape. Thin skin shrinks very quickly, so how to handle it quite literally a few moments.
Heat treatment can also be used to secure the shape of the leather parts, for example, for disclosure of through slots or cuts in the veins of leaves. You can singe in the flame of a candle or gas stove burners loose and "shaggy" flesh side (underside) of the part.
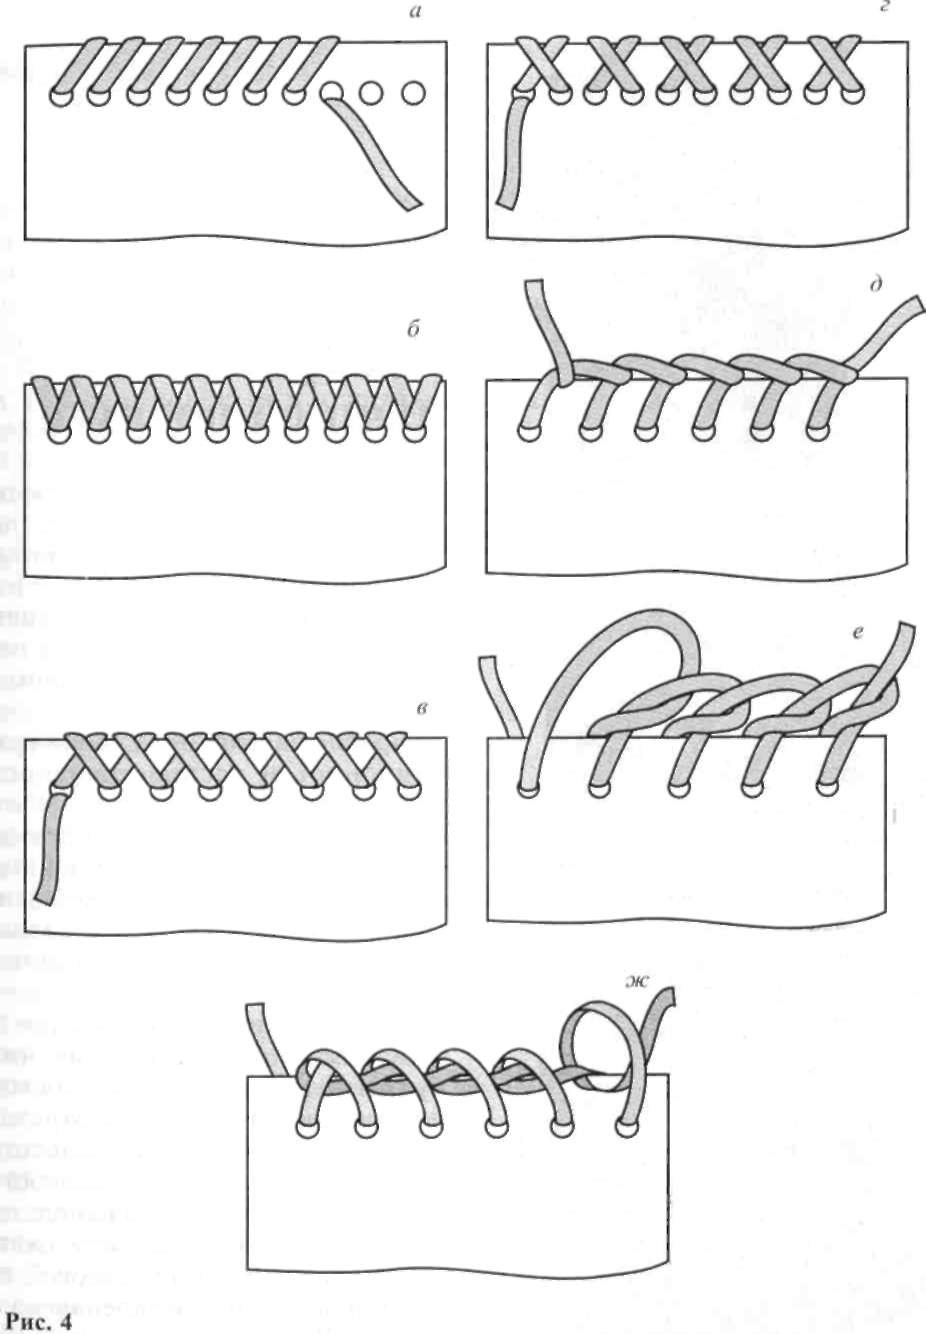
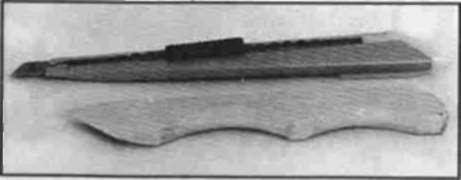
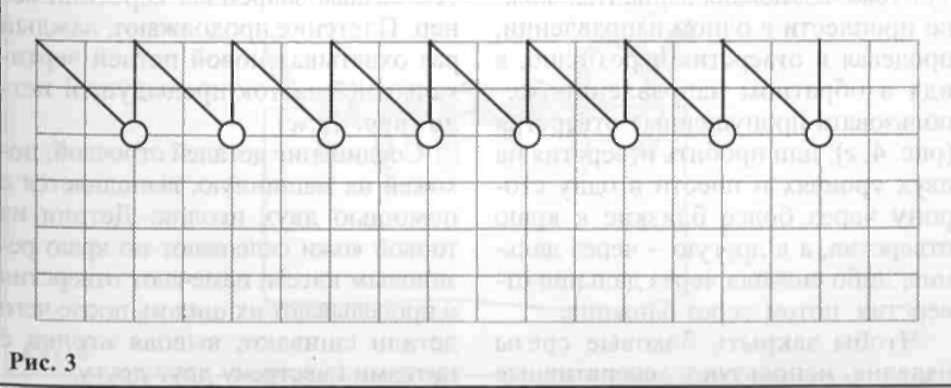
Braid is one of the most common types of connection parts and decoration leather. The holes for the stitches marked with a special line, made from a sheet of thin cardboard (from a box of chocolates) and graph paper (figure 3). Paper glued to cardboard, measure the distance from the edges of the leather items to the line hole location. To draw the line. On this line lay the distance between the holes, often 0,5-1 see Connect the resulting points with the edge perpendicular line. The intersection of this line with the edge line connecting a point adjacent the holes for the braid. The resulting triangles cut out. If the part is of complex shape, it is necessary to cut the line of the same shape and mark the holes on it using a ruler and a compass.
While working on different products, you will make holes for the braid at different distances. Gradually gather the whole set of lines. Label size and keep them all together, then you don't need to do them again.
The easiest way braid in one direction. Parts put together so the holes match; the end of the cord glued between them and entwine the region around his cord and every time threading the cord into the next hole (figure 4A).
A variation of this method - braid Venetian, which have a wider cord of soft leather. The edges of the parts fully covered by the cord (figure 4, b).
A variant of the braid in one direction gives a two-level hole location. For example, apertures placed at a distance of 0.5 cm from each other, relative to the same edge are in the following order: odd - at a distance of 0.5 cm from the edge, and even at a distance of 1 cm. Or Vice versa.
The second simple option is braided in two directions. First, the detail of the braid as described in the first case, then the same cord (or cord of a different color) in the opposite direction (figure 4). There are possible options: you can priplesti in one direction, threading the hole through one, and going in the opposite direction, to have missing holes (figure 4. g); or to punch holes on two levels and weave in one direction through closer to the edge of the hole, and another through the far; or first through the far holes, then through the neighbors.
To close the side sections of the product, use a decorative braid. The simplest of them is the blanket stitch (figure 4, d) having several varieties. Entanglement can be maintained in both directions - from left to right and right to left; the seam will look a little different.
First let's start weaving from right to left. The short end of the strap threaded into the second hole to the right in the direction of yourself. The long end of the stack loop. In this loop pass the short end is in the direction of myself. Complete end releases, conceding the short end into the first hole on the right. Now I'm long end. Its about to go in the next hole, is carried out under the previous section of the strap loop and put in a new loop that you just formed (figure 4, e).
The second stitch will start on the left. Strap braid tucks into the first hole on the left in the direction from itself. Near to by side leave a small tip. The long end of the output through the second order in the hole and put a loop, thus securing the short end. Continue braiding, each time covering a new loop vertical section of the previous loop (figure 4, g).
The connection of the parts line that is similar to the machine, is performed using two needles. Details of thin leather glued along the edge of the rubber glue, outline the holes and make them with an awl, then stitch the details, bringing a needle and thread to meet each other.