")
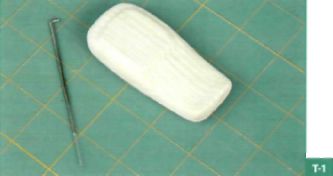
• the layout of the mobile phone (it can be cut from a block of wood);
• needle feliziani;
• wool.
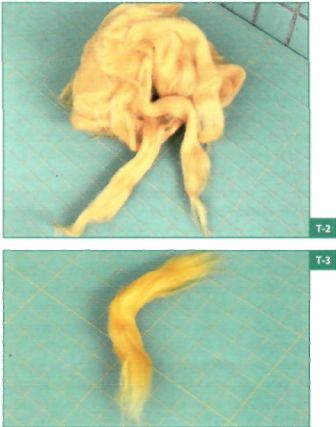
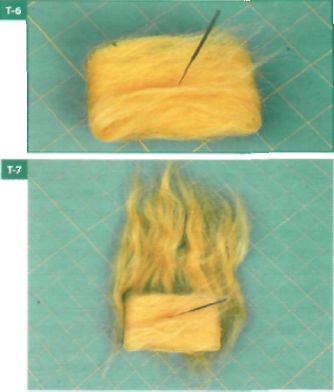
In factory worsted wool comes in the form of a tape coiled on a bobbin, and in this form it is called "combed ribbon", and a small portion separated from the tape will be called "pasma". So, take a coat (why not yellow?) (photo T-2), tear off Pasa a length of about 1.5 - 2 times greater than the length of the layout (picture T-3), we will stretch it in the transverse direction more or less uniform layer and place the edge of the layout (picture T-4). Next, wrap the layout in it's "blanket" (photo T-5), and the ends will sahnem to one side and fix with a needle (photo T-6). Repeat this operation 2 more times, alternating longitudinal and transverse layout Hanks (photo T-7).

The result is that such a cocoon (photo T-8). Before the next step, take a breath and tune in, because it will largely determine the quality of the surface and, consequently, the appearance of the toy, but it is the most time consuming and boring.
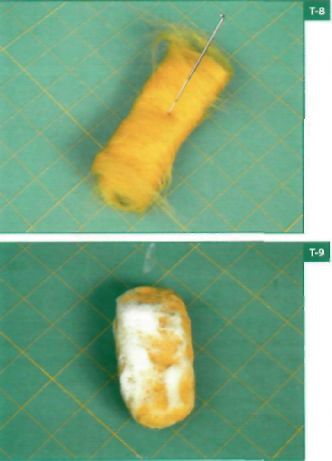
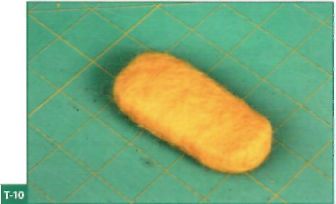
Moisten the cocoon in hot water and carefully we soap up beyond (photo T-9). Both must be done carefully so the coat is not lost in the mounds and formed bald spots, so the product at this stage, keep the fingertips of one hand and with the tips of the same fingers of the other massaged the sealing layers of wool. Until when? It's hard to convey in text, which is a subjective sensation, at which point you can move on to tougher felting, and this feeling comes with experience. But, anyway, at a certain point the product needs more power to start to massage and squeeze in your hand. And time this process can take anywhere from 25 to 50 minutes with breaks for rinsing products to control the quality of the felt surface and another soaping for further felting. When the product will look like (photo, T-10), felting can be completed and thoroughly rinsed, send it to dry.

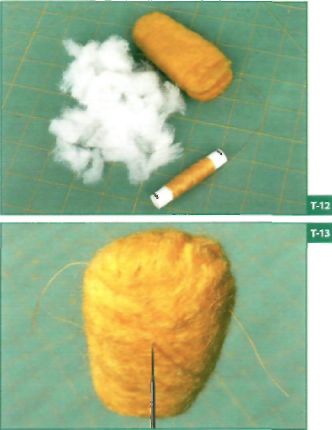
So, our toy-phone-dried. For further work you must extract the layout. Most suitable for this place will obviously be the top part of the phone where the cut is made (photo T-11). Probably not worth it to dwell on that investment products involve the selection of this form, which will allow you to remove the layout without breaking the shell. Otherwise, please assume that the product will be nonseparable, i.e., the layout will remain inside, which is also possible, but you need to consider some nuances. For example, what if you intend to produce several instances, the layout will have to make for everyone. And second, the presence in the shell of the layout will not allow to fully apply filte-tion, because the needle would simply "poke" him. But back to the phone. The hole needed to make this magnitude to just remove the layout, and not more, because in the future we will have it (cut) mask. The void is filled with filler. This can be a synthetic winterizer or small pieces of rubber foam, but not wool, because we don't want the litter was dumped. We choose the batting (photo T-12). Small portions fill the shell, regularly tamping batting with a pencil. In the filling process to control the density of the shell, avoiding too dense areas or voids. Upon completion of the packing the incision neatly sutured temporary seam (photo T-13). In most cases, still needed a product to smooth and stretch your fingers for a more uniform distribution of filler and give the product the correct form.
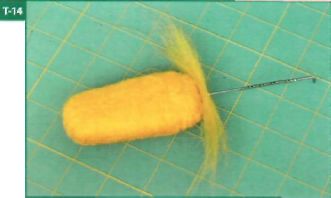
The masked section. This takes the strand of wool and is applied as a patch on the wound (photo T-14). Work is entered by the needle. Thread the seam you can gently start to clean up at the stage when it imposed "the patch" will "grow together" with the body, cutting them with scissors and pulling out tweezers. If to retrieve something fail-not a problem, we need a reasonable compromise, because in trying to remove all the bone you can apply a bad fix damage shape. Maybe for a complete masking of the incision will have to apply multiple patches-pads.
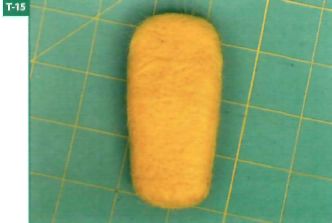
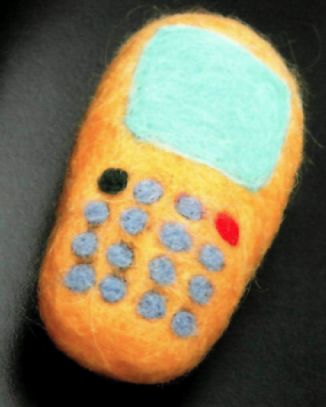
All (photo T-15). You can now proceed to the design of the phone.
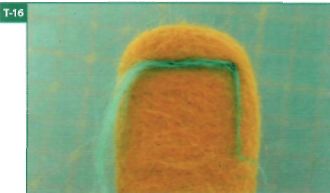
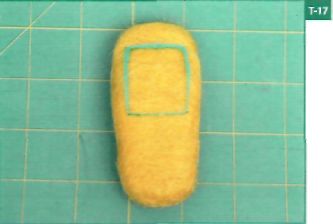
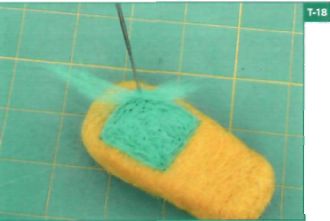
Let's start with the screen. Will tsepnem from combed tape thin and long strand of wool and light puncture with a needle will fix it on the case, "drawn" in this way the contours of the screen (picture T-16, 17). Then, using short and wide strands of hair, "paint" the entire screen evenly (photo T-18).
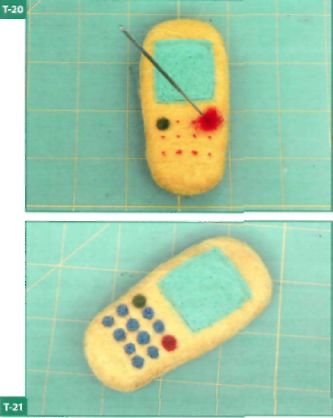
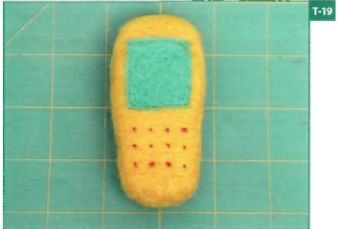
A further step is application buttons. Thin felt-tip pen will denote the point on the site of their future location (photo T-19). As a button is offered utilizati in case wool felt balls, rolled up with two fingers from scraps of wool. Nothing different from the previous procedure no. Five to seven needle punctures the ball in the center is fixed at the marked point, follow the correct edges, in place of the buttons did not work blots, and the completion of a needle walks across the button, forming the desired surface (picture T-20).
So, click finish (picture T-21). Now the stage last and most touching. Touching because the toy is gradually taking a final shape, and becomes an unexpected quality — never leaves a haunting feeling that it is something alive. This is the phenomenon of the impact of felt products. And it's alive again begin to bathe under the hot water, soaping, with a slight smoothing, rubbing between the palms. So after that, rinse thoroughly and to dry previously, while wet, with your fingers to clarify the form.