


")
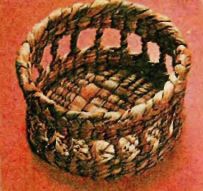
Decorative plaits on the walls of this beautiful basket makes it more interesting and do not hide the lining. Another feature of the basket — the presence of thick and strong edges, which is a series of"tracks".
You will need:
(for baskets with a diameter of 200 mm)
20 of the stems with a length of 600 mm, a width of approximately 12 mm;
20 thin stalks;
a piece of cloth with a size of 500 X 1000 mm and cord length of 1500 mm;
cylindrical shape (a pot or large tin can).
Weave the base ("in the box") for around the stands, but with twice the number of racks, located on the edge.
Put down the table ten racks, of which the first and last make dual. Extreme lateral should also be doubled. (This will reduce the size of the checkered area and to achieve its round shape even before the base reaches the size of the form.) Make two rows of way, "twisting", saving stand double. Stop and check the tension and alignment racks. On the next row of weaving will share a double rack.
Continue to braid until the product reaches the size of the base form. Firmly attach the base to form (figure 2).
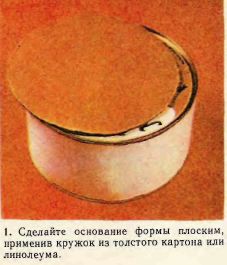
The bottom
Racks it is necessary to wrap one around the other to form the low ledge on which to stand the basket. In fact, it is not necessary, and racks can be priplesti immediately along the walls of the mold, as in the basket for a bouquet (see p.45).
Weave start with any stands. Bend her right over the top of the next, and then downward, around the same rack (figure 2). We go around the front hold with your left hand. Continue stitching around the circumference. The last stand thread through the first bend. Try to stand in the process of netting does not crumple, and maintained a flat shape. If necessary, moisten and plushevaya stand.
Slender stems proplatit four rows by way of "twisting", tucking the ends of the rods in weaving. The middle part of the wall and whipping at their discretion in different ways and patterns. You can go, for example, rope, netting stitch, or continue the weave by way of "twisting" to the end.
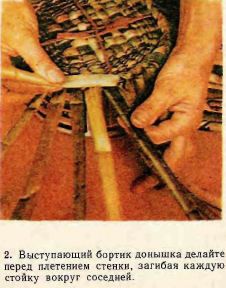
Twisted wall
When you run this pattern to use two racks, as in weaving handles basket for the bouquet. In this twisted struts make approximately a length of 25 mm. Try to keep all of them turned out the same. Until the next surgery will fix their clothesline clothespin (figure 3). After that, disconnect the strut and weave by way of "twisting" the same number of rows, how many were made to run harnesses. Make sure that the first row of netting is completely smooth around the entire circumference.
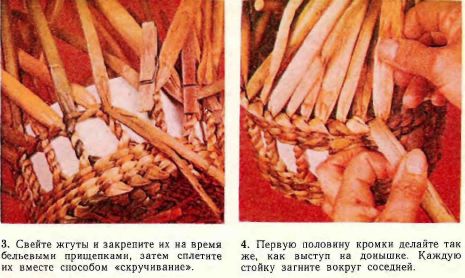
Edge
The basket can be finished the same edge as the basket for a bouquet, and you can try to make more complex — is shown in figure 4 and 5.
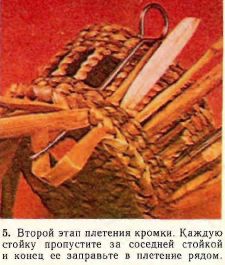
Bend each rack down and then up around the nearby pillar, i.e. almost the same as in the manufacture of the bottom (see figure 2). Then each rack will take a V-shape. Try to stand to remain flat and not kinked, and coiled neatly at the base of the V. (If necessary, stand humidify and flatten.) The last stand thread through the first bend. Now finish the edge the same as at the basket for a bouquet, i.e. each foot alternately fold in one or two neighboring and fill in the weave. And here, too, try to stand was flat and not crumpled (figure 5).
Lining and screed
From a piece of fabric cut out a circle of diameter equal to the diameter of the base shape and with an allowance of 20 mm on the seam, and a strip with a width of 450 mm and a length equal to the circumference of the form with an allowance of 40 mm at the joints.
Sew the strip (along its width), then fold it in half wrong side inside and smooth the seam. Prostrochite, departing 20 mm from the fold. Strut outer side seam 12 mm under the stitching and on the same height, cut the fabric exactly opposite the seam. Now make a second line, departing 12 mm from the top, there is formed the belt loops for tightening lace.
To the side of the lining, sew the bottom circle so that the seam was on the outside. Sew the bag to the base of the basket with a few stitches, carefully grabbing at the edge. Do not put seams on the outside. Cut the lace in half. Thread one piece of it all over the belt loops. Tie the ends node. Then repeat the same thing with the second lace, vdev it in the opposite hole. You will be able to pull the bag, simultaneously pulling on both ends of the laces.
