")
You will need:
a thick string;
thick and thin stems for weaving a spiral;
needle with very large eye, such as sack or carpet.
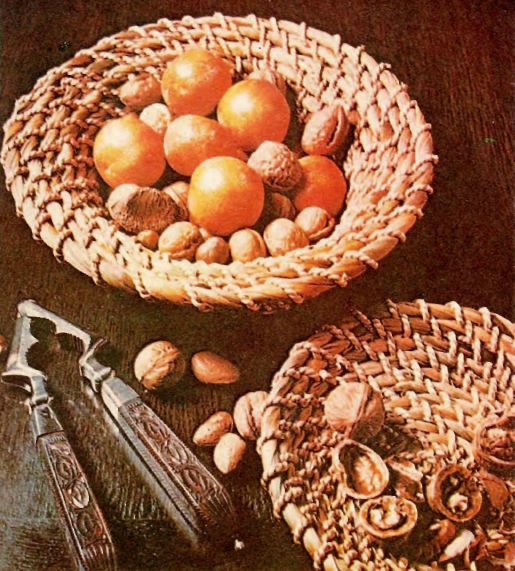
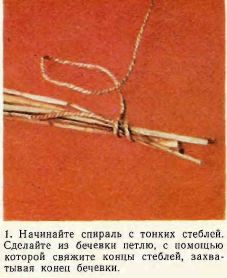
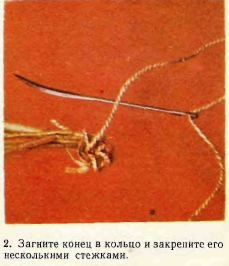
Manufacturer of helical meals — a great opportunity to use all of the remaining stems, thick and thin, long and short. Having studied and mastered the techniques, you will be able to weave a dish of any shape, and flat coasters, mats, vases and baskets of all sizes. For a large basket or Mat, draw the thick stems, and dishes, or vases — thin. For the beginning of the spiral we need to take the thin stems of reeds, even if the netting is large and heavy products. Take a few stems (their number depends on the thickness of the coils) and fold along their narrow ends, and along them run the end of the string (about 100 mm). With a loop at the long end of twine, tie the stems to 20 mm from their end, capturing the short end of the string (figure 1). Fold the ends of the stems to form a circle, beginning a spiral. The long end of the twine, continue to associate kamishini, capturing the "tail" of the spiral. Pass the string to the needle (figure 2) and sew each following round the circle, trying to pry the string from previous row and not to pierce the stems. The farther from the center of the spiral, the wider will be the stitches. When they diverge about 25 mm, make each row one stitch more. Continue sewing in a spiral, adding new stems and maintaining a constant thickness of the product. To attach the new twine lay it along the length of 70-100 mm on the outer edge of the spiral and sew old until the end of a length of 70-100 mm, the end of the old string, sew the same way (figure 3).
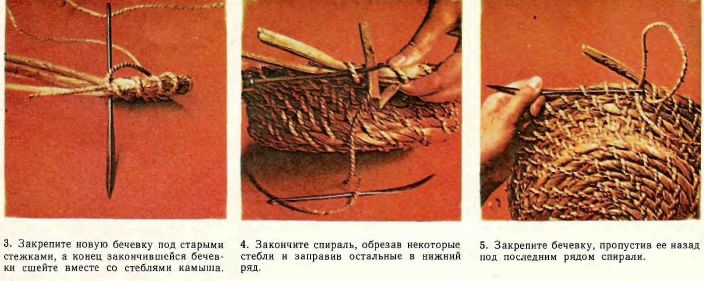
To finish the spiral, gradually, from about 150 mm from the end of the weave, cut one after the other stems, reducing the thickness of the spiral. At the end of the weaving, tuck the end of the string in the opposite direction.
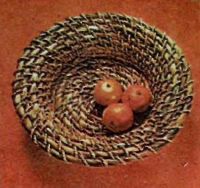
Spiral to give the product the desired shape, start to build up the walls when the substrate is sufficiently increased, placing each new round on top, not the side from the previous one. To receive the inclined walls put new coils approximately in the middle between the top and side positions.
If you want to make a product with complex shapes, cut-out cardboard template of the desired profile and follow it increase every round in the right place.
Product finish edge — additional round of several stems.
Starting to sew the piece stems that form the edge, Express their free ends with a length of 100-125 mm each. Finishing sew the edges, cut some of these tips left free at the beginning of the edges and some ends of the stems, which finish the edge. This is done in order that the edge thickness was the same everywhere. Adding the start and end edges together, finish sewing the edges. Secure the end of the string and passing it back under the last row of the spiral (figure 5).