


")
 This work will be presented dry and wet felting wool (master class). When decorating bags with valve is used feliziani yarn for knitting and tops.
Wet felting wool. Master classMaterials:
- 200 g polutorki felted wool (tops) coral color
- 40 x 80 cm stiff tulle (mosquito net)
- the polyurethane construction of a heater plate for manufacturing template
- white soap (baby, household, liquid, shampoo); plastic massager (if you have)
- oilcloth
- pallet
Execution of work:
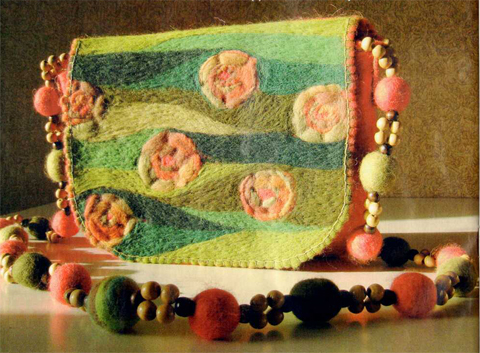
 First, you need to make a template. Polyurethane plate, draw a rectangle 35 x 30 cm Rounded edges of the lower part of the pattern is the easiest to draw, putting a tea saucer. Easier to cut with a utility knife, and it is very important that the cut is smooth, without broken transitions, otherwise it will be difficult to extract the template from the woolen cocoon. Cut out the template (photo 1) should be cleaned of polyurethane crumbs. It is desirable to work on a table covered with oilcloth.
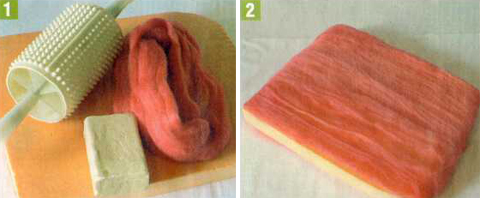
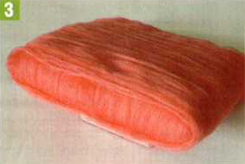 From the roll tops pasmo tear off a length of 75-80 cm and carefully laminate to have a uniform structure. Start to wrap the tape pattern of this wool vertically (photo 2). When pasma ends, add the following. The second row lay out horizontally. Similarly, lay another 4 rows tops. The last row should always be located horizontally. Watch carefully so that when the wrapping pattern tops avoid any bald spots or seal (photo 3).
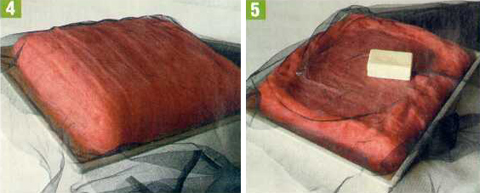 In a pan lay half of the tulle and on him lay the wrapped pattern, the second half of the tulle to cover it from the top (photo 4). The pallet is required so the water leaked on the table and at the same time moistened bottom layer of tops. Tulle is used for several reasons. First, it protects the layers of wool tops from the offset in the first stages of felting. Secondly, it is better for felting using soap, and in this case, the sheer performs the function of a grater (no need to pre-make a soapy solution). And third, it helps to turn a product, and there is no fear that the felt will spread in different directions.
Very thin stream pour the hot water work from the center to the edges. Hands Pat the entire surface, smooth sheer and lather work (photo 5). Perform a stroking motion along the fibers. After 5 minutes, turn the billet on the other side and follow the same steps. Turning once again to carefully remove the tulle. Now tighten the sides of the bag at the plane of the felting, and from the middle of the sidewalls make a stroking motion towards the center of the template. When the sides are a bit matted, you can start to make the so-called plucked massage. To side well matted, put the bag on the edge and go ahead on all four edges. On the reverse side follow the same movements. When the felt is "sit" on the template, continue the usual felting.
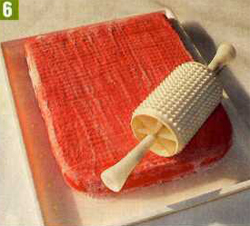 The workpiece can be removed from the pallet, and directly on the table. To felting felt tight, required a considerable physical effort. At this stage you can use the massager (photo 6).
Flat felting involves the processing of felt plates on both sides, but if you wallow on the template are not accessible inside, and the fiber there is not enough compacted. So after hours of felting work, rinse and leave to dry until the next day.
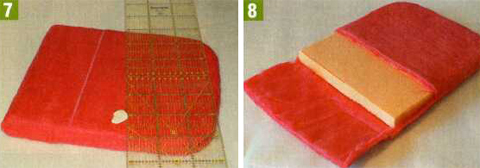 On the surface of the dried preform, mark where to cut. To do this, from the bottom of the bag, measure 25 cm and spend a horizontal chalk line (photo 7). Follow the cut lines from the middle of the side part to the middle of the other sidewall and up the side to the top edge (photo 8). Remove the blank from the template.
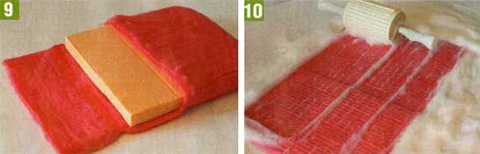 You now have a bag with a valve, but the inside felt not materialised. Therefore, proceed to the secondary felting. Pull the workpiece onto the template, after removing her on the wrong side (photo 9). Go ahead inside, as before the front side on the template, and then removing the template on the table (photo 10). After felting the product, rinse in warm water, soak for 15-30 mins in water with vinegar, wring. Tutuila valve through cheesecloth or a piece of fabric so after drying, it is not deformed. The cavity of the bag again, pull the template and leave to dry.
Feliziani
You now have a bag with a valve, but the inside felt not materialised. Therefore, proceed to the secondary felting. Pull the workpiece onto the template, after removing her on the wrong side (photo 9). Go ahead inside, as before the front side on the template, and then removing the template on the table (photo 10). After felting the product, rinse in warm water, soak for 15-30 mins in water with vinegar, wring. Tutuila valve through cheesecloth or a piece of fabric so after drying, it is not deformed. The cavity of the bag again, pull the template and leave to dry.
Feliziani
So, blank bags ready. Now start it decoration method feliziani is a dry method of felting with special needles with notches, which helps the wool fibers to intermix with each other, firmly connecting.
You will need:
- tops
- yarn for knitting
- needle for faltsevaya No. 50
- manual needle device (if there is a machine for faltsevaya)
- foam and brush for faltsevaya
Execution of work:
We must not forget that valve is not trimmed to the final size, so decide what shape it will, and cut with a small margin. Now you must select the pattern that will be caused on the valve. It can be any pattern, a plot, or your imagination. Draw it on paper in the size of the valve, determine the color gamut in which you work, pick up the yarn and tops.
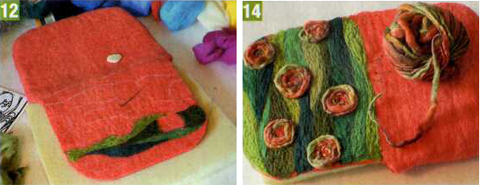
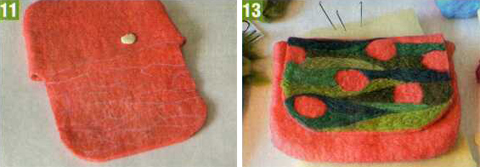 Chalk transfer valve drawing contours (photo 11). To the foam place the valve bag and with a needle run the "tattoo" pattern. Always keep the needle perpendicular, not tilted: the tip of the needle is very thin and if the work is tilted, the needle will instantly break. When you spread the tops, a needle unroll it, giving the lines bend, and wool the desired direction, and immediately drive the needle. You can work for both small and large pismami (photo 12,13,14).
 When the whole picture is pinned, take a manual needle device, put the valve on the special brush and carefully satilite wool several times passing through the same place. When the work is finished, you will see that on the back side of the valve is formed fluff. Especially actively it appears when working on filialei car. Amperite valve through the gauze on both sides.
Pen manufacturer
When the whole picture is pinned, take a manual needle device, put the valve on the special brush and carefully satilite wool several times passing through the same place. When the work is finished, you will see that on the back side of the valve is formed fluff. Especially actively it appears when working on filialei car. Amperite valve through the gauze on both sides.
Pen manufacturer
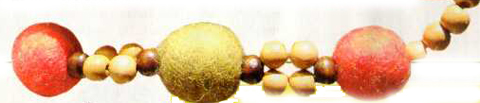 Coil of yarn for knitting the balls with a diameter of 2 cm on the bag 19. Needle profilseite the ends of the threads. Tear off from the roll tops strand and laminate it to size 5 x 25 cm, put the prepared ball and immediately satilite her. If your felted beads will turn out neat enough, put them in a nylon Golf, tie it and wash it in the washing machine at 60° C.
Going to handle on the principle existing in beading - Nizhnie on two needles. In the sidewall at the corners are fastened two needles in them vdet thread "iris" (length 1.5 m). On each needle you got to put 3 bamboo beads, then both needles pass successively through a bamboo bead, and felt again the bamboo. Then on each needle thread 2 bamboo beads, then again negutsa 3 shared beads (bamboo, felt, bamboo). Ends handle in exactly the same way as it started, the corners of the side of the bag. And then you can sew the lining to make any closure.Your felting wool (master class) is finished. Now you can be happy to wear a handbag handmade.
Author: Galina Krasnikova