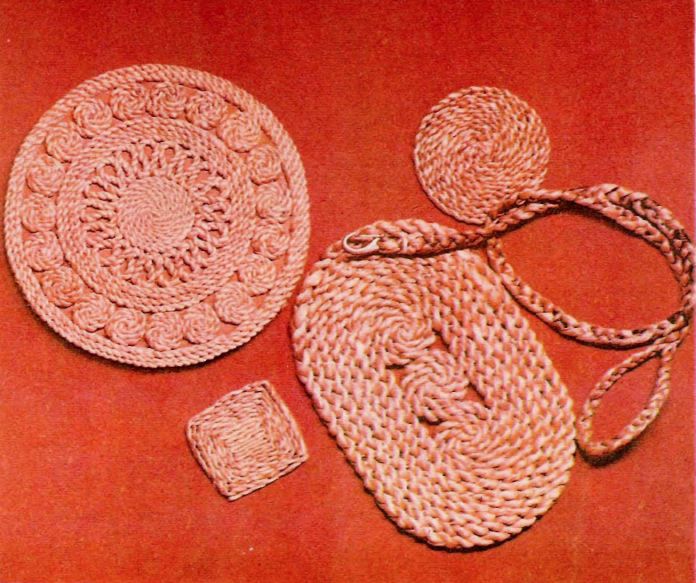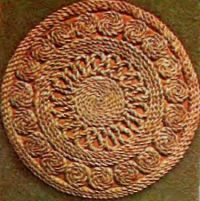
You will need:
stems of different lengths and thicknesses depending on what you want pigtail;
thread of medium thickness, preferably green; a long, thick needle; plate to push the needle.
Twisted braids can be any thickness — very thin to elegant stands, the average for pads or sandals and thick for rugs and baskets. Of braids you can perform a variety of patterns and products of various forms.
Take a few stems and tie them at the end, then divide into three equal beam, trying to combine thick bars with thin (if necessary, equal two thin one thick stem). Never take less than six stems (three pairs), otherwise it will be difficult to connect new and to maintain the thickness of the beams constant. Do not take also stems the same length, - as in connection will be thickening. Tie the ends of the string, tightening the knot so you can hook it over a hook driven into the wall (figure 1).
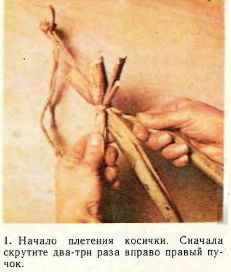
Take one beam in the right arm and two to the left. Twist the right beam two or three times to the right, then put it on top of the middle beam. Now one or two times twist the left beam and place it over the right so that the end of it was between the right and middle beams. In this sequence, continue to braid the entire tail.
Twist the beams only the right hand and the left hand just hold the pigtail. To braid is strong and tight bunches all the time necessary to pull and twist hard enough. It doesn't matter if the finished braid is twisted around the axis, in the finished product it will be unnoticed.
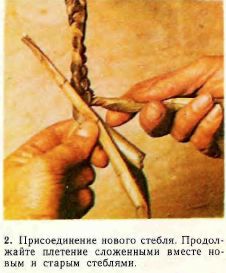
The ends of the stems in bunches grow in the moment when their length approaches 100 mm, and the beam in which they are located, occupies a middle position. Put the new stem along the old (figure 2), and to maintain a constant thickness of the beam to attach the thick end to the thin (and Vice versa). Trim the ends when done braiding all braids.
For starters, braid two or three braids of length less than 1 m, it will help to learn the technique and the next cornrows, from which you will stitch a variety of products that will smooth and neat.
Stitching braided pigtails
Spiral
Pass the thread in the needle. The end of the braids, wrap the thread five or six times and secure with a few stitches. The rest of the braids cut closer to the coil (figure 3).
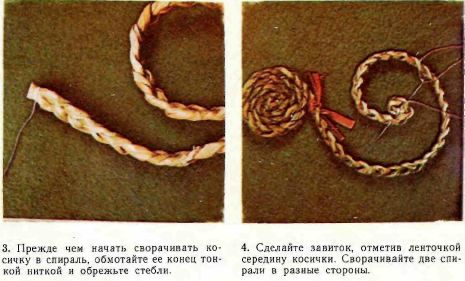
Start to twist the braid in a spiral, and for attaching flash the coils of thread. Continuing to twist to make a spiral, make the stitches more often, and if necessary, overwrite the same place twice. Now, push the needle through the thick braid with the help of a plank. If the product is very thick, not superfluous pliers, which can easily pull out the needle. If the pigtail is very thin, ssuite it, using a simple thimble.
Curls
For stitching the tendrils need a short pigtail. Only experience can tell what the length of the pigtail will need depending on its thickness and on the diameter of the curl. However, all curls, which will consist of a finished product must be of the same size.
Take the braided pigtails and turn her into a spiral of the desired diameter. For curl you will need the pigtail double length. Tie both ends of the long braids, and mark its middle (figure 4). Now pull the braid two spiral with both ends tightly ssuite turns to the marked place.
Patterns with loops (see illustration at the end) make long braids. To the last coil of the helix (in the Central part of the holder) firmly sew the long pigtail and bending it in the form of loops, shivite in the field of contact. At the same time, making two or three stitches in one place thread inside the braid until the stitch in a different place. When will be ready all the loops, sew them next turn of the spiral, securing it in places touch.
Square and oblong stand
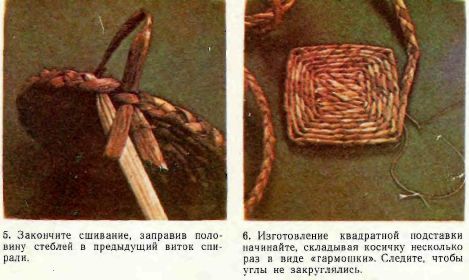
Manufacturer of square or oblong base to start differently. You can, for example, to stitch together two or three curls in and around them to sew a long pigtail. You can also sew the first braid, folded several times into a tight "harmonica", and then proceed to cover its perimeter (figure 6).
The end of the work
Make sure none of the stitching is not visible from the outside of the last round of braids. Ssuite turns so that the stitches were either below it, or between the turns. If necessary, at the end of the helix, completing the product, soak the stems to give them flexibility. Cut half of the stems in each bundle (not necessarily at the same level) and tuck the remaining ends in a pigtail to the previous round below the last round looked smooth and continuous (figure 5). Not an easy task, but the gain in work experience allows you to cope with it.
Products in the form of a Cup or basket
The basis of such products can be done flat, then start to build up the walls as well as in the manufacture of coiled baskets.
Leash for dog
You will need: a clasp with ring;
2 mm braided pigtails.
Make a loop for the hand, threading the stems into the leash as well as at the conclusion other products of braided pigtails (figure 5). In the same way, attach to the end of the leash clasp
